This post may contain affiliate links. Please read our disclosure policy.

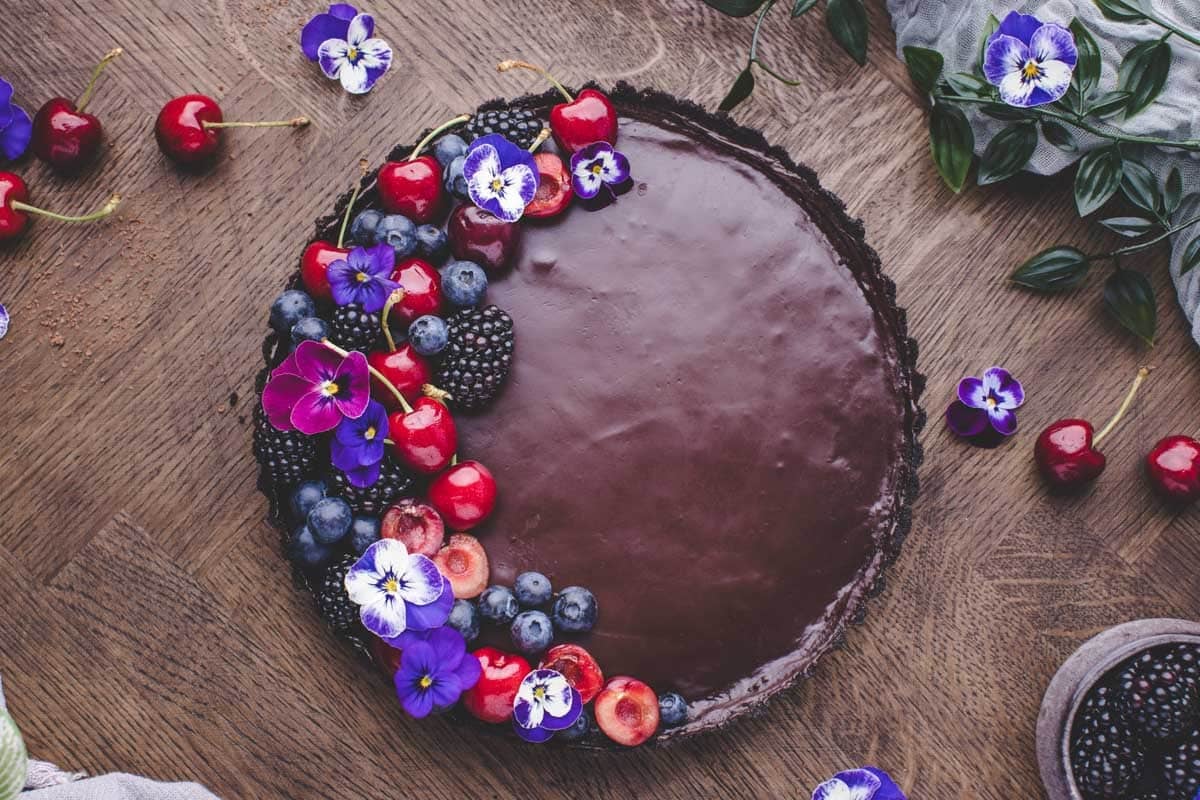
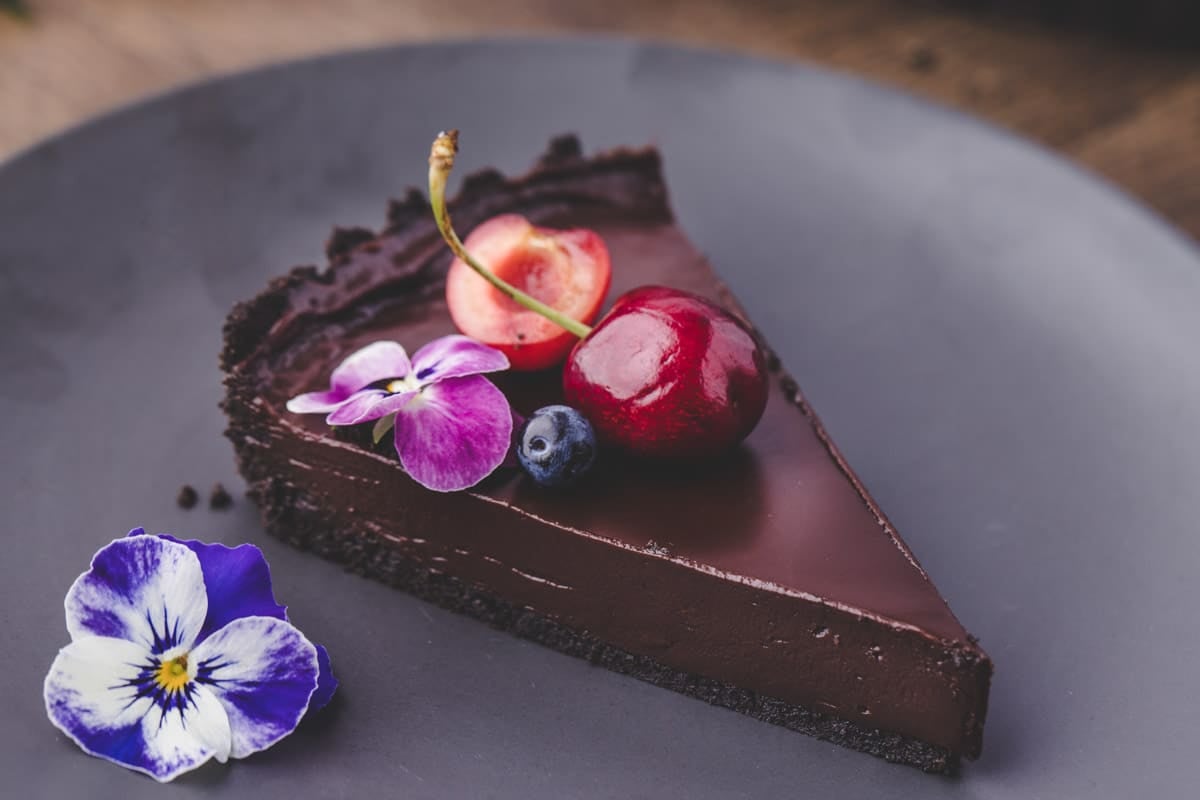
My easy chocolate tart recipe is flourless and doesn’t require baking. It features a simple Oreo crust in a 9-inch tart pan. The chocolate tart filling is made from melted semi-sweet and milk chocolate that’s mixed with butter and cream. It’s rich, luscious, and delicious — and you can have it put together in about 20 minutes. Let it sit 4-5 hours, and it’s ready to serve.

As a fourth-generation Southern cook, I’ve made a lot of pies and tarts over the years, but this flourless chocolate tart just might be my favorite. (I know, I say that about all of them, especially my Fudge Pie.)
This one is just so easy, and the chocolate flavor is strong enough to satisfy a grown-up palate, but mild enough to keep the kids happy, too. (Or, just give the kids these brownies and THAT will make them happy.)
Testing results for no-bake chocolate tart
- You do not need to remove the white filling from the Oreo cookies before crushing them in the food processor.
- We prefer using chopped chocolate bars rather than chips for this recipe. It really makes a difference in the taste and melting quality of the chocolate.
- We tested this tart in a 9-inch (23 cm) tart pan, which worked perfectly with this amount of filling. If you have a different size, the tart will still work just fine. However, if your pan is smaller, your filling will be thicker (you may have to omit a little), so it may take longer to set. If your tart dish is larger, your filling will be thinner and may set more quickly.
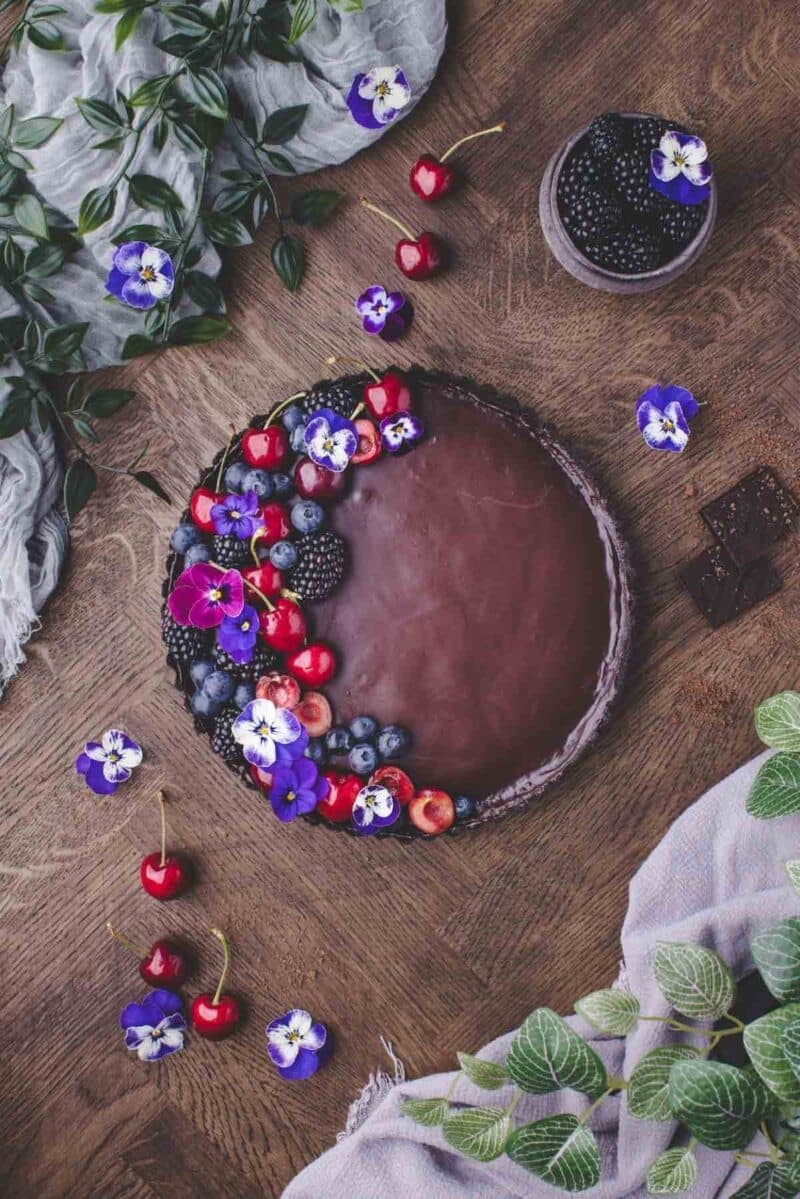
- We used a combination of dark-colored fruits to decorate the chocolate tart because we loved the tonal vibe. You can use any fresh berries or fruit you like.
- The edible violas came from my photographer’s garden, and she says they are very easy to grow. You can find edible violas at your local garden center, farmers’ market, and some bigger supermarkets. You can also buy seeds from Amazon. Please check that the flowers you use are definitely edible before using them.

I hope you make this recipe. I think you’ll love it!

Ingredients
➡️➡️➡️ The full ingredient amounts and instructions are listed below on the printable recipe card. Scroll below the recipe card for frequently asked questions and tips for success.
Oreos: Use regular Oreos, not double-stuffed.
Chocolate: Chocolate bars or baking bars will work better than chips.
Heavy cream: Do not use milk or half-and-half. You need the heavy cream to get the right texture.
How to make the no-bake chocolate tart
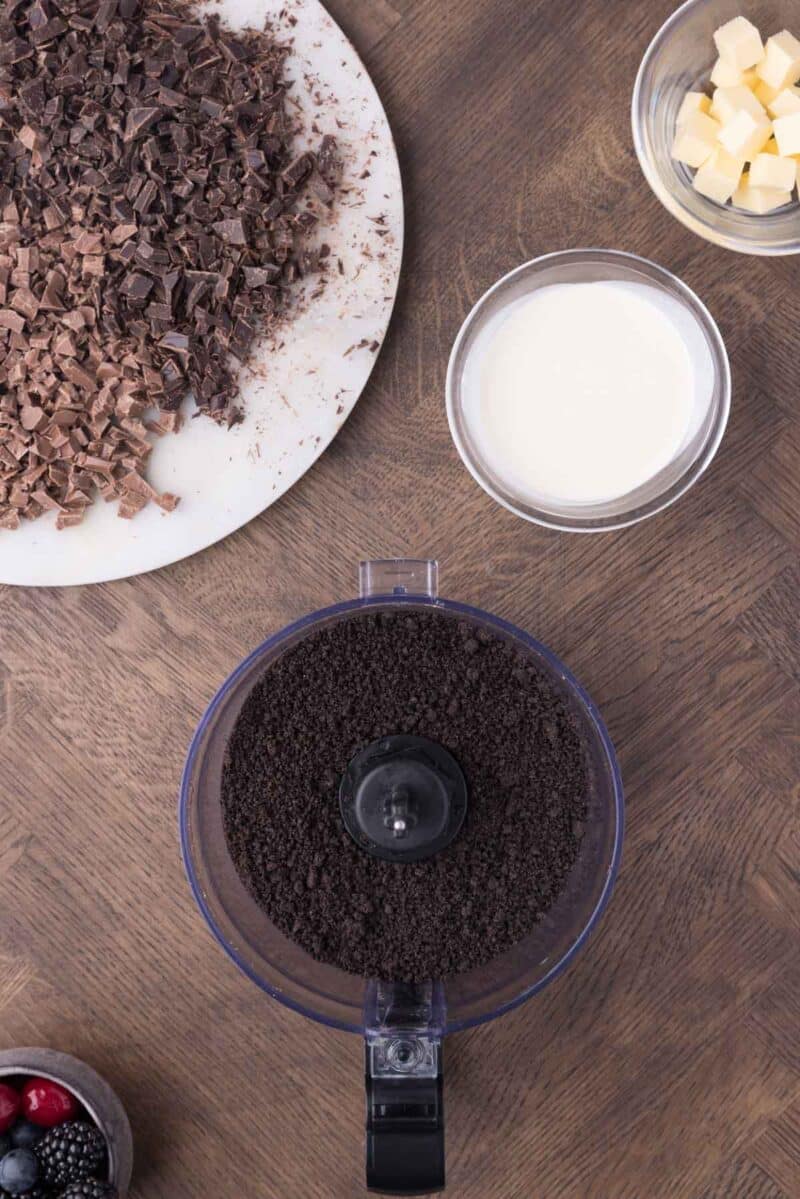
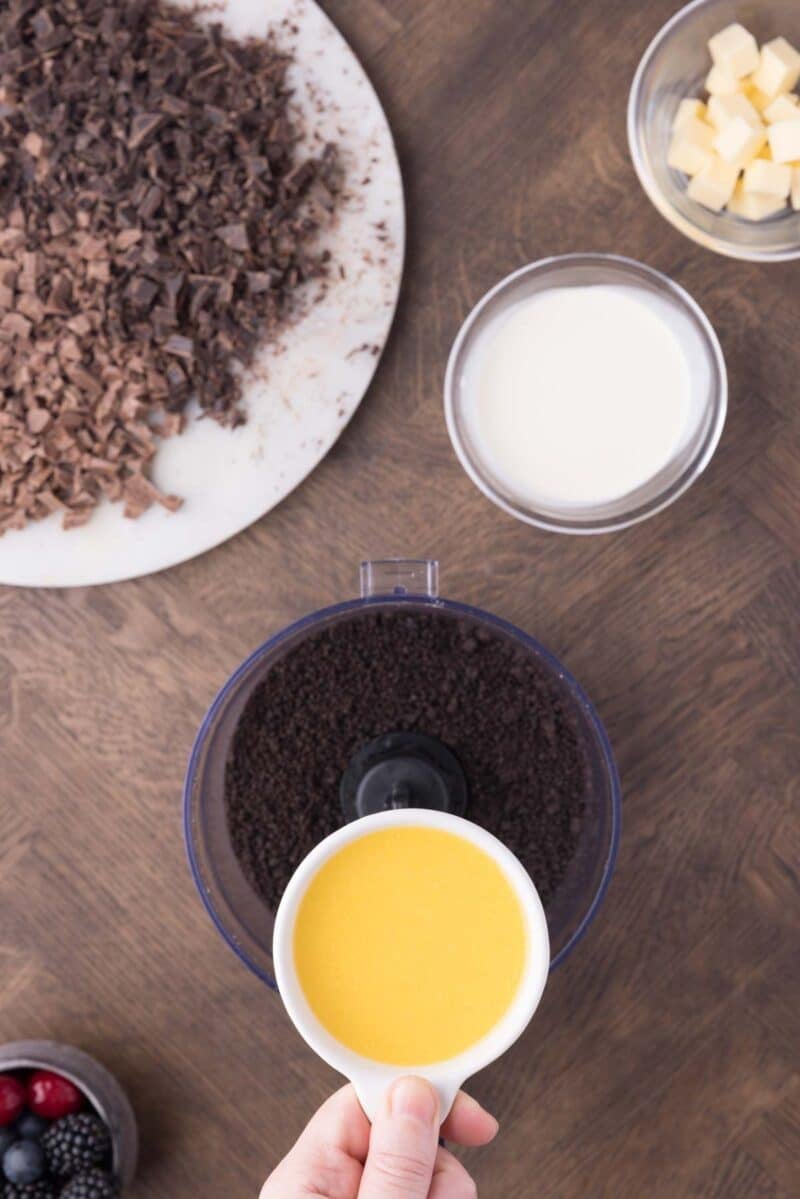
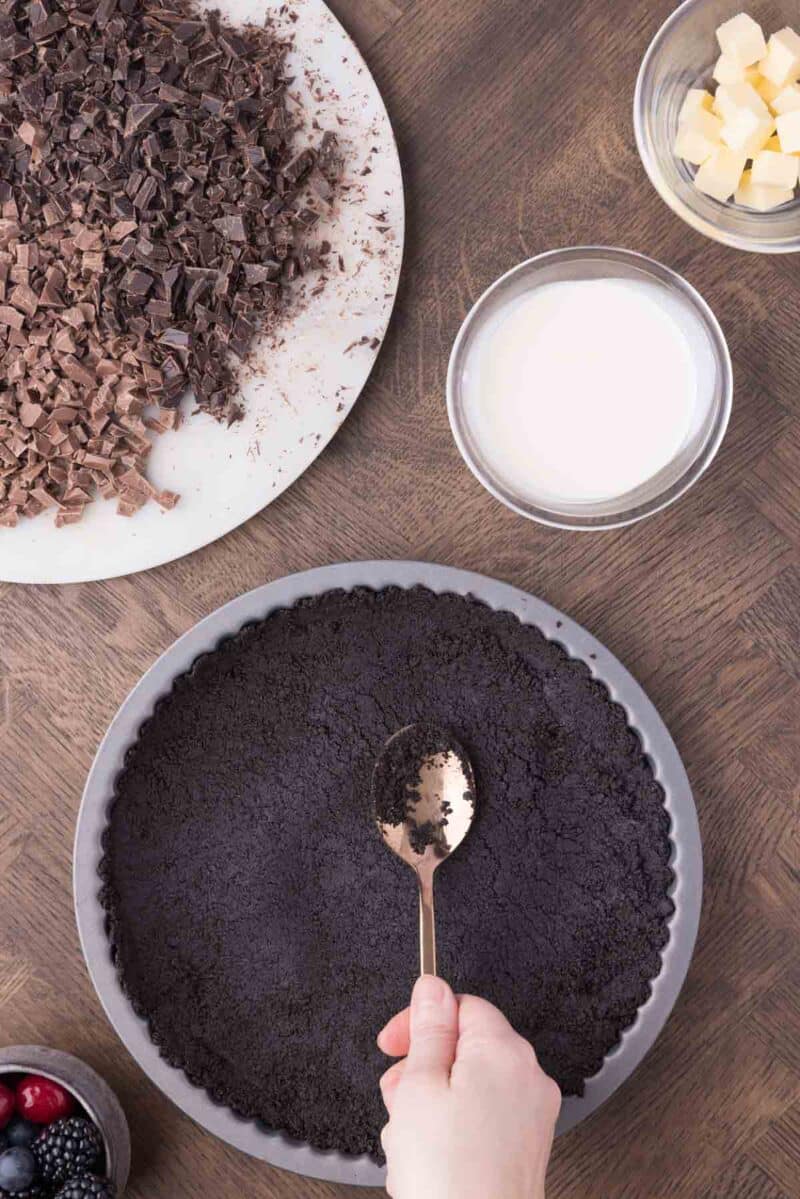
- Crush the Oreos in a food processor, then stir them into melted butter to make the crust. Press the mixture into the tart pan and set aside.
- Melt the chocolate and butter using heated heavy cream.
- Pour the filling into the crust and allow it to set for at least 4 hours.

If you make this recipe, please leave a comment and ⭐️⭐️⭐️⭐️⭐️ below!
Join Southern Food and Fun Community group
and Southern Potluck group!
And please follow us on social media:
No-Bake Chocolate Tart


Ingredients
- 22 regular Oreo cookies
- ½ cup unsalted butter, melted
For the filling:
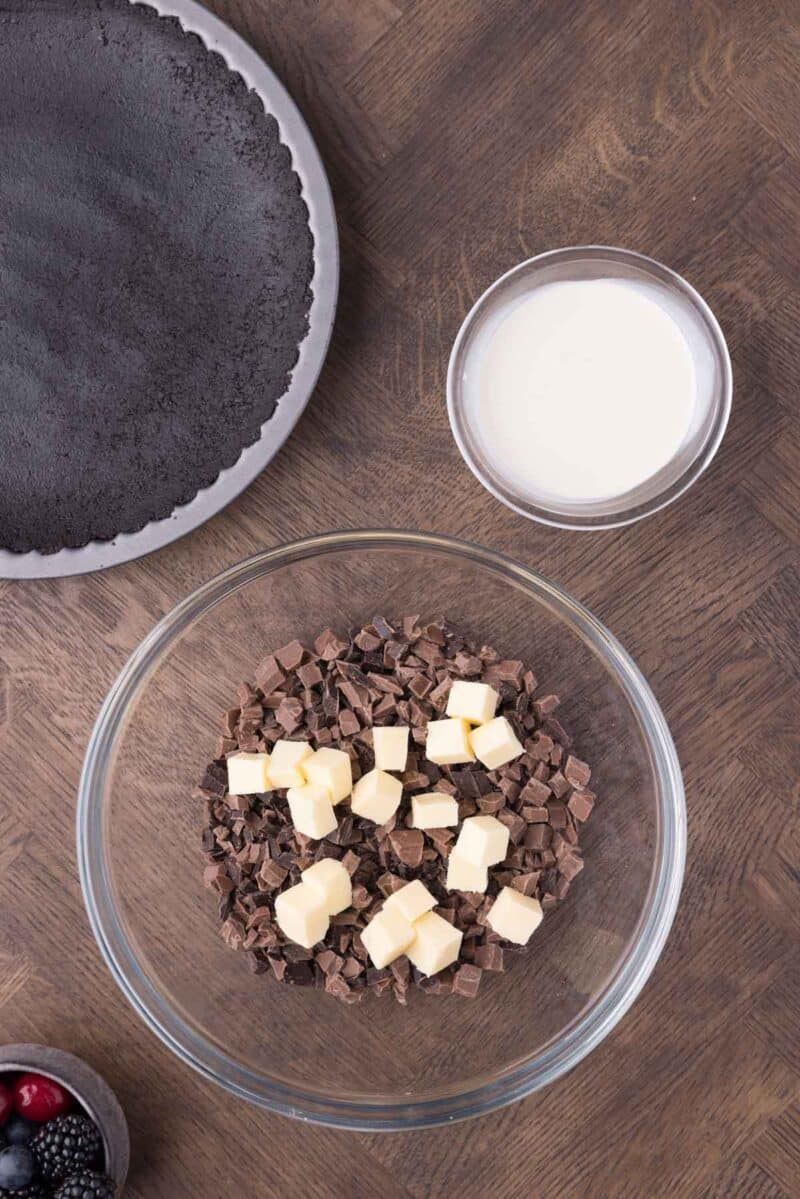
- 1 cup semi-sweet chocolate, finely chopped
- 1 cup milk chocolate, finely chopped
- 2 tablespoons unsalted butter, cubed
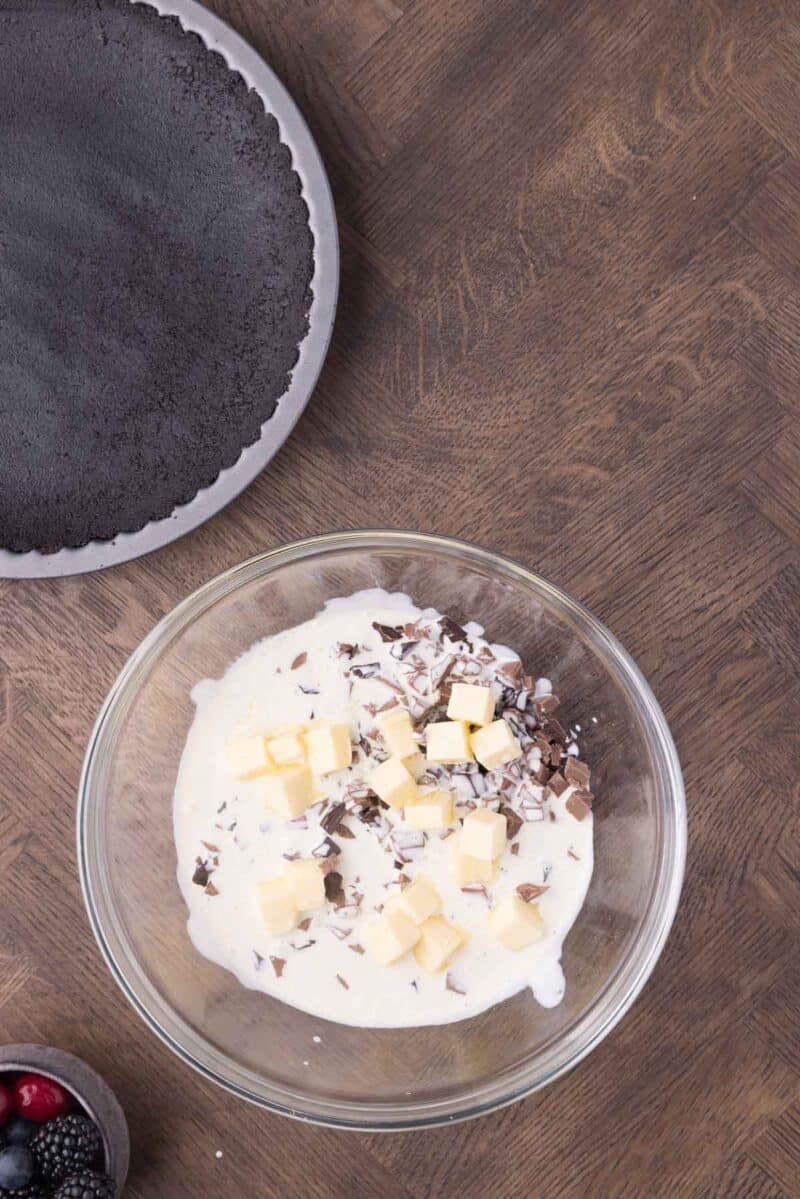
- 1 cup heavy cream
Optional toppings:
- berries
- edible violas
Instructions
- Put 22 regular Oreo cookies in a food processor and pulse until they are a very fine crumb. Alternatively, place them in a ziplock bag and mash them with a rolling pin.

- Add ½ cup unsalted butter, melted to the food processor and process until fully combined. Pour the crust mixture into a 9-inch tart pan.
- Use the back of a spoon to press the Oreo crumbs into the tart pan until fully compacted. Set aside for now.
- Add 1 cup semi-sweet chocolate, finely chopped, 1 cup milk chocolate, finely chopped, and 2 tablespoons unsalted butter, cubed to a heat-proof bowl.
- Pour 1 cup heavy cream into a saucepan set over a low heat. Remove the pan from the heat just before it comes to a boil (do not allow it to come to a boil, as this will cause the chocolate to seize). Pour the cream over the chopped chocolate and butter, then put a plate over the top and leave it for 5 minutes.
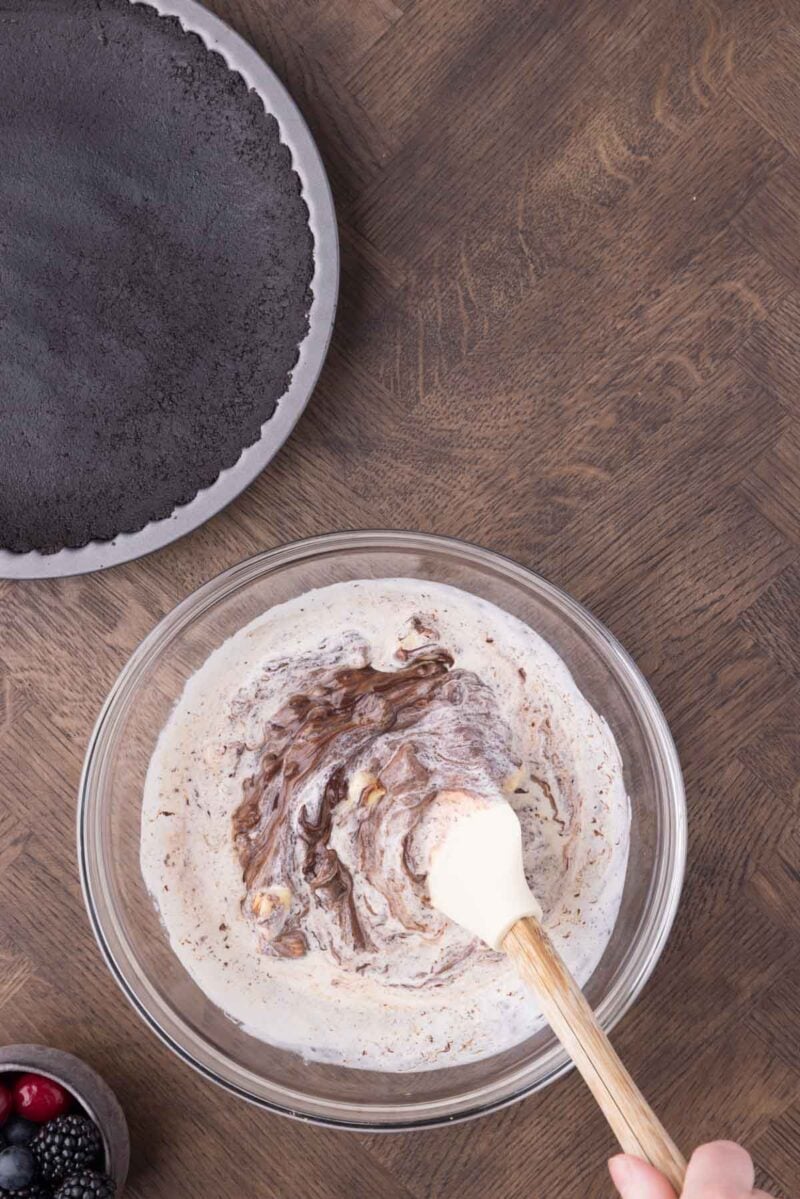
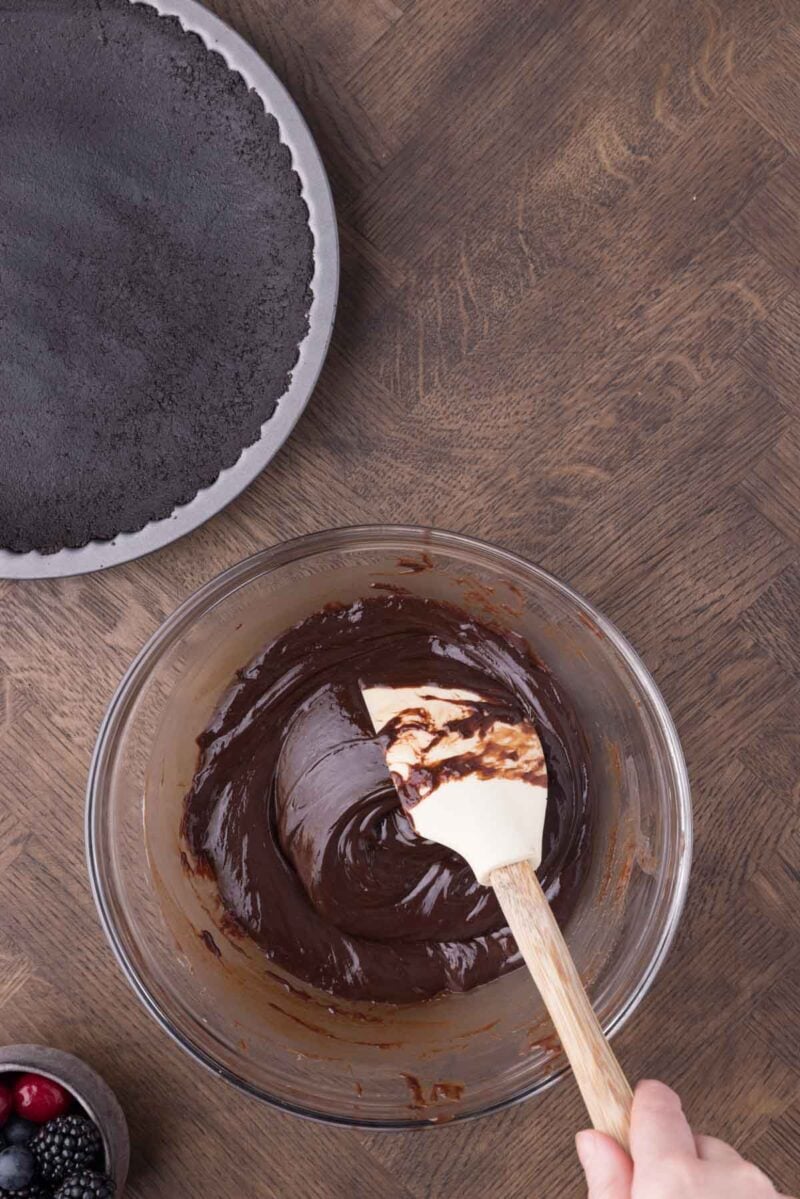
- After 5 minutes, use a rubber spatula to slowly mix together the chocolate, butter and cream.
- When all the ingredients are fully combined stop mixing. If the chocolate hasn’t completely melted see the recipe notes below.
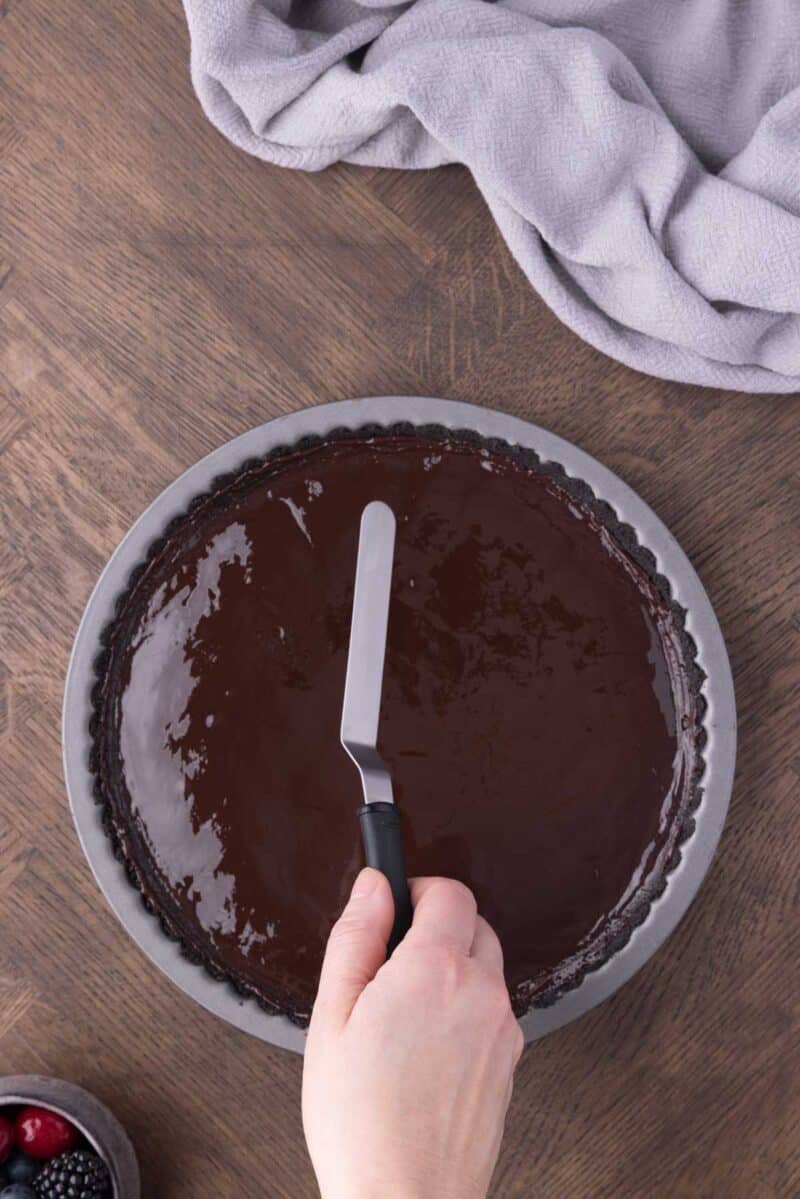
- Pour the chocolate filling on top of the Oreo crust, use an offset spatula to spread out the filling so that it is very smooth and even. Allow the tart to set for at least 4 hours before serving.
- When the chocolate filling has set, decorate the tart with the fresh fruit and edible violas.
Notes
- You do not need to remove the filling from the Oreos before pulsing.
- We find it easier to work the Oreo crumbs around the edges of the tart pan first and then smooth out the center.
- It’s important to chop the chocolate very finely so that it all melts at the same rate. Take care not to allow the heavy cream to come to the boil. If the cream is too hot, the chocolate will seize.
- If the chocolate doesn’t completely melt, make a Bain-Marie by adding an inch of boiling water to a small saucepan and place the bowl of chocolate on top of the pan (don’t let the bottom of the bowl touch the water). Stir the chocolate very slowly until it has all melted.
- Stop stirring the moment the chocolate filling ingredients have melted together. The reason for this is that if you over-stir at this point, the chocolate can lose its beautiful shine.
- It’s unlikely to happen, but if the chocolate seizes, you can attempt to rescue it by doing the following:
- Use the Bain-Marie method as described above, and vigorously whisk the chocolate filling until it comes together.
- If this doesn’t work, you can add room temperature milk a teaspoon at a time until the mixture comes back together.
- For the best results, allow the Chocolate Tart to set at room temperature, as this will give you the smoothest filling. However, if the weather is very warm, you can put the tart into the fridge to set.
Nutrition
Questions and tips
Storage
Store the chocolate tart covered in the refrigerator for up to 3 days. If you’re not serving immediately, don’t add the toppings until ready to serve.
We liked the mix of semi-sweet and milk chocolate, but you can certainly use all of one or the other. I would not use bittersweet since there’s no added sugar.