This post may contain affiliate links. Please read our disclosure policy.
A classic cheesecake recipe that’s creamy, rich, and irresistibly delicious — without the hassle of a water bath! This recipe uses a unique baking method that guarantees no cracks, so you’ll get a picture-perfect dessert every time. We use Philadelphia cream cheese, a little sour cream, vanilla, and pantry ingredients to make the creamiest, most delicious cheesecake you’ve ever tasted.
First posted in 2014, this cheesecake recipe has been beloved by thousands of readers for over ten years. We’re confident that you’ll love it too!
Absolute 100% perfection. Best cheesecake I’ve ever had!
JORDAN
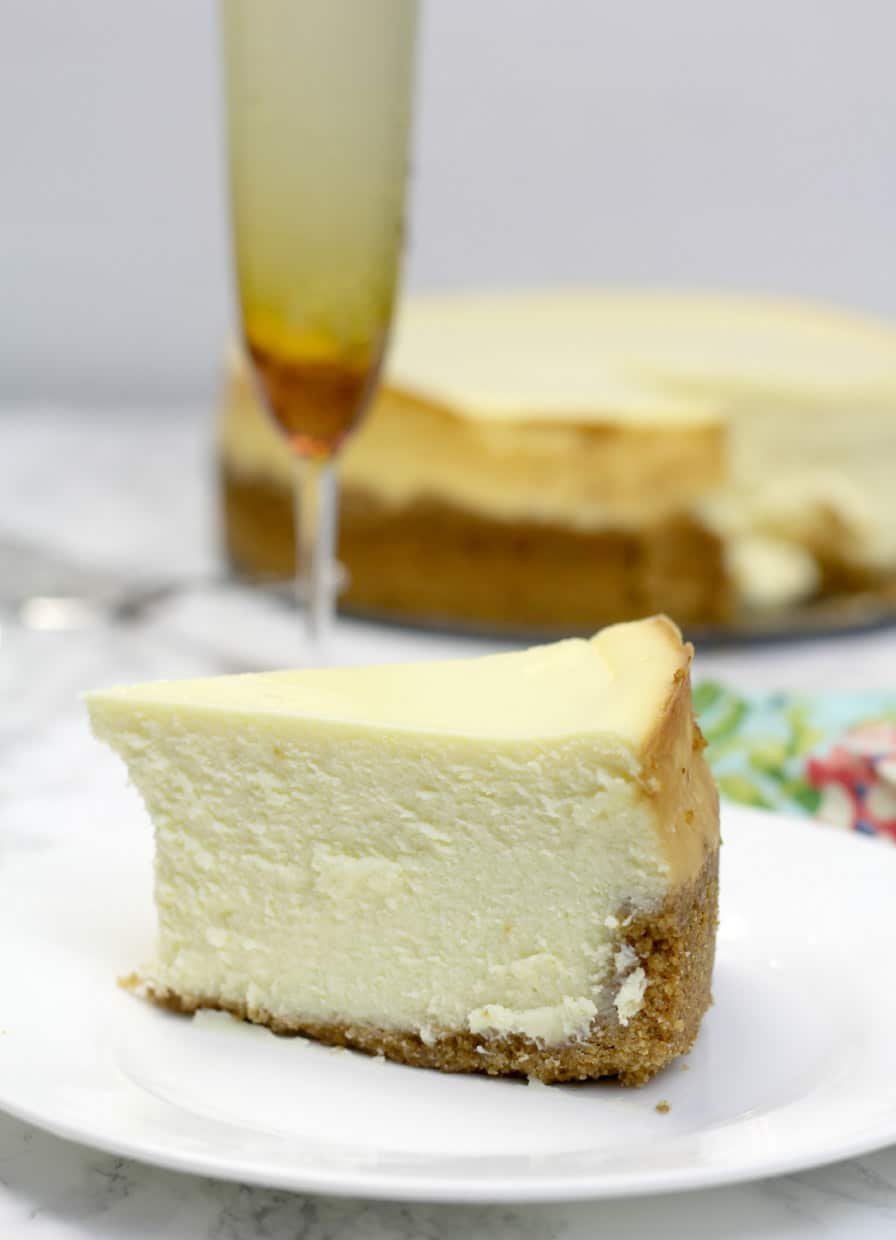
Table of Contents
Why this recipe is the best original cheesecake
TASTE: This cheesecake’s creamy texture and amazing flavor will have your guests asking for seconds. Our taste testers requested more graham cracker crust, so we increased the amount to make a taller and slightly thicker crust. It’s so delicious!
EASY: Making homemade cheesecake sounds daunting, but it’s one of the easiest desserts to make, especially with this simple recipe. Everything mixes together quickly, and then you bake and chill. And you do not need to use a water bath!
Our unique baking technique requires a large roasting pan filled with water to rest underneath the cheesecake while it’s baking. The moisture and steam from this water, along with our mixing and baking method, results in no cracks EVERY TIME.
MAKE-AHEAD: Cheesecake is the perfect make-ahead dessert. It’s actually better if you make it a day or two in advance. It can be stored in the refrigerator — or, if you need to make it several days in advance, this cheesecake freezes well.
A tall and creamy cheesecake is a great dessert if your family has different tastes because you can dress it up with toppings geared to please everyone, and you can make the cheesecake several days before you need to serve it.
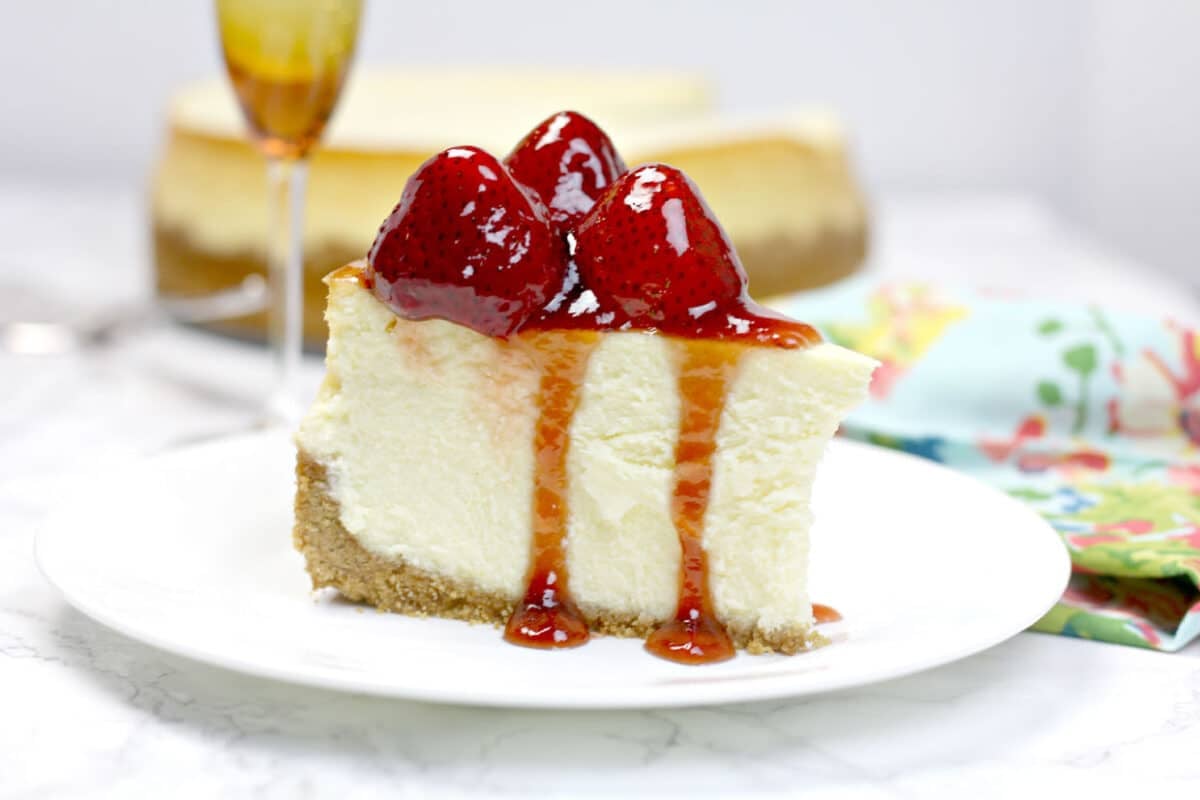
I usually include a fruit-based topping like raspberry sauce, my husband’s favorite caramel sauce, or this chocolate ganache, all of which pair perfectly with this classic cheesecake recipe.

I hope you make this recipe. I think you’ll love it!

Ingredients for cheesecake
➡️➡️➡️ The full ingredient amounts and instructions are listed below on the printable recipe card. Scroll below the recipe card for frequently asked questions and tips for success.
You could call this a Kraft Philadelphia cheesecake because that’s the only brand of cream cheese I ever use. I do not recommend store-brand cream cheese for this recipe (or any recipe). Most of the ingredients for this recipe are standard for cheesecake, but here are a few notes to be aware of:
Graham cracker crust for cheesecake
Graham cracker crumbs: It’s totally fine to use the box of pre-crushed graham cracker crumbs. This makes life so much easier!
Brown sugar: We add a touch of brown sugar to the crust for extra flavor.
Cheesecake filling
Philadelphia cream cheese: Use only full-fat cream cheese, not whipped or low-fat. We use five 8-ounce blocks, so if your cream cheese comes in larger blocks or different increments, you’ll need to weigh the cream cheese to get 40 ounces.
Sour cream: This recipe has only a small amount of sour cream (1/4 cup), but it’s important to use full-fat, high-quality sour cream.
Lemon juice: Please, for the love of Pete, do not use bottled lemon juice in this or any other dessert recipe. Grab some lemons and a citrus squeezer, and use fresh juice. It makes everything brighter and better. Bottled lemon juice is dull and gross.
Vanilla extract: I absolutely love using my Mexican vanilla in this recipe — but I only buy it IN Mexico, so if I’m out, then I’ll use a good quality vanilla extract, like Nielsen-Massey Vanilla.
How to make cheesecake
For best results with this classic cheesecake recipe, you’ll need a stand mixer, although if you don’t have one, you can use a hand mixer; it will just take a bit longer. Mixing the cream cheese until all the lumps are out is key.
- Make the crust. Combine graham cracker crumbs, white and brown sugars, a pinch of salt, and melted butter until well-mixed and moistened. Press the crumbs into the pan and bake for 10 minutes. Remove from oven and set aside to cool to room temperature.
- Prepare the oven. Place a large roasting pan filled with water on the bottom shelf of the oven. (This is what I do in lieu of a water bath, and my cheesecake never cracks!)
- Make the cheesecake filling. Mix the cream cheese, then add the sugar and mix again. With the mixer on low, add the sour cream, lemon juice, vanilla, and salt. Continue mixing until well blended, scraping the sides and beaters often. Add the eggs to a small bowl and lightly beat with a fork, then add to the batter. Mix in the eggs just until blended.
- Bake the cheesecake. Pour batter into the cooled crust. Bake at 400 for 10 minutes. Reduce oven to 225. Bake for 1 hour and 30 minutes.
- Resting time. Turn the oven off and let the cheesecake sit in the oven with the door closed for 30 minutes. Then, open the door slightly and let the cheesecake sit in the oven for another 30 minutes.
- Cool and chill. Remove the cheesecake from the oven and cool at room temperature for 2-3 hours until completely cooled. Cover and refrigerate overnight before serving.
This cooking technique, slightly adapted from Ina Garten’s raspberry cheesecake recipe, is probably another reason this cheesecake doesn’t crack. After the cheesecake has baked for the recommended time, Ina says to leave it in the oven with the door slightly open and the heat off.
Your cheesecake may still be slightly jiggly in the center, but will firm up as it sits in the refrigerator.
For an even easier recipe, try our simple Chocolate Chip Cheesecake.
Note: This recipe was adapted from Ina Garten’s Raspberry Cheesecake Recipe.

If you make this recipe, please leave a comment and ⭐️⭐️⭐️⭐️⭐️ below!
Join Southern Food and Fun Community group
and Southern Potluck group!
And please follow us on social media:
Classic Cheesecake Recipe
Equipment
Ingredients
Crust
- 2 ½ cups graham cracker crumbs
- 2 tablespoons granulated sugar
- 2 tablespoons light brown sugar
- Pinch of salt
- 10 tablespoons unsalted butter, melted
Filling
- 2 ½ pounds full-fat cream cheese, room temperature (5 8-ounce bricks)
- 1 ½ cups granulated sugar
- 5 whole large eggs, room temperature
- 2 large egg yolks, room temperature
- ¼ cup full-fat sour cream
- 2 teaspoons fresh lemon juice
- 2 teaspoons pure vanilla extract
- Pinch of salt
Instructions
- Preheat oven to 350.
Crust
- Spray the sides and bottom of a 9-inch springform pan lightly with non-stick baking spray and line the bottom with parchment paper.
- In a medium-sized bowl, combine 2 1/2 cups graham cracker crumbs, 2 tablespoons granulated sugar, 2 tablespoons light brown sugar, a pinch of salt, and 10 tablespoons unsalted melted butter until well mixed and moistened. Using a flat measuring cup or glass, press the crumbs into the pan and up the sides.
- Bake for 10 minutes. Remove from oven and set aside to cool to room temperature.
- Increase oven temperature to 400.
Filling
- Place a large roasting pan filled with very hot water on the bottom shelf of the oven. (This is what I do in lieu of a water bath, and my cheesecake never cracks!)
- With mixer on medium beat 2 1/2 pounds full-fat cream cheese, room temperature (5 8-ounce bricks) for a couple of minutes, then add 1 1/2 cups granulated sugar and beat for 5-8 minutes, until light and creamy and there are no visible lumps. Scrape the bowl and beaters frequently.*
- With mixer on low, add 1/4 cup full-fat sour cream, 2 teaspoons fresh lemon juice, 2 teaspoons pure vanilla extract, and a pinch of salt. Continue mixing on low until well blended, scraping the sides and beaters often.
- Add 5 whole large eggs, room temperature and 2 large egg yolks, room temperature, to a small bowl and lightly beat with a fork. Add the lightly beaten eggs a little at a time to the mixer bowl and beat just until blended.
- Pour batter into the cooled crust. Bake at 400 for 10 minutes.
- Reduce oven to 225. Bake for 1 hour and 30 minutes.
- Turn the oven off and let the cheesecake sit in the oven with the door closed for 30 minutes. Then, open the door slightly and let the cheesecake sit in the oven another 30 minutes. The cheesecake may still appear slightly jiggly but will set as it rests in the refrigerator.
- Remove cheesecake and cool at room temperature for 2-3 hours, until completely cooled. Cover and refrigerate overnight before serving. The longer you refrigerate the better the texture will be.
Notes
- Scrape the bowl and beater frequently to ensure all the cream cheese is thoroughly blended and there are no lumps, because cream cheese lumps will not melt in the oven.
- Place the springform pan on a baking sheet just in case of any drips.
- To remove the springform pan, chill the cheesecake for several hours in the refrigerator. Then, run a knife around the edges of the pan to help loosen and remove the side. Use an offset spatula to gently loosen the cheesecake from the bottom of the pan, and then remove the parchment paper and place the cheesecake on a platter.
- This is a great make-ahead recipe. You can make the cheesecake several days in advance of when you need to serve it.
Nutrition
Our best tips
- Be sure your ingredients are at room temperature. This will help ensure the cream cheese has no lumps, and you have a smooth batter.
- Scrape the sides and beaters frequently. Lumps of cream cheese will stick to the side of the bowl and can end up in your batter.
- Use the roasting pan filled with very hot water to prevent cracks in your cheesecake. I’ve tried the water bath, but it’s a pain to deal with. It occurred to me that my cream cheese pound cake recipe calls for a bowl of water to be in the oven while baking, and that could work for the cheesecake, too — and it does!
- While you do need to mix well enough to eliminate any lumps, you don’t want to overmix this batter. Don’t whip the cream cheese on high. Too much air will cause air bubbles, and that can cause cracks.
- For this same reason, we lightly beat the eggs with a fork before adding to the batter and then mix just until they’re blended in.
- Use a flat measuring cup or glass to smooth the graham cracker crumbs in the pan before baking.
Reader questions
We like to place our cheesecake on a pretty cake stand or platter when serving. To help, spray the springform pan with non-stick cooking spray and then line the bottom of the pan with parchment paper.
After the cheesecake cools in the refrigerator for several hours, it should be pretty firm. Run a knife or offset spatula around the sides and then loosen the sides and remove.
You can then use an off-set spatula to carefully slide between the parchment and the pan bottom. The cheesecake should lift right off, and then you remove the parchment paper and place it on the platter.
Don’t add any toppings before freezing.
If you want to completely remove the cheesecake from the pan, follow the instructions above. Once the cheesecake has cooled in the refrigerator and you remove it from the pan bottom, slide it onto a plate or parchment-lined cardboard. Wrap it well with plastic wrap and then aluminum foil and place it in the freezer.
Freeze the cheesecake for up to three months.
The cheesecake filling is typically gluten-free (this recipe is), but the graham crackers are not. However, you can buy gluten-free graham crackers. I did this one year for my mother and no one could tell the difference. It was delicious!
Use the jiggle test: When the cheesecake has a slight jiggle in the center but is set around the edges, it is considered done. For this recipe, you’ll have a little bit more of a jiggle until after the resting time in the oven. As long as your oven is calibrated correctly, the timing of this recipe should yield the best results.





Do I need to adjust cooking time if baking 2
I have never baked two of these cheesecakes at the same time so I’m not positive. I probably would not adjust the baking time unless for some reason they are not getting done.
I’ve never made a cheesecake… crossing my fingers. Yall pray for me. Lol
Great!
I will make the cheesecake tomorrow!
Thanks
Years ago, and is mean years ago, Regis and Kathy Lee had the NY Firemen on the show and they had won some contest with their recipe for cheesecake. I went right to town and purchased a set of spring form pans and made it! LOVED IT…but you know what? I haven’t made it since! Your post has inspired me to make it for a dinner party and I will use your recipe! Meanwhile, I am going to compare to see if it is one and the same! Thank you for sharing your love of creative cooking, recipes, tips and inspiration. <3
Thanks, Ms. Geri! Let me know how it turns out 🙂 Try to make the day before and let it sit in refrigerator overnight. The recipe for the raspberry sauce is also on the blog and the caramel sauce is basically my caramel frosting recipe but just don’t beat it into frosting.