This post may contain affiliate links. Please read our disclosure policy.

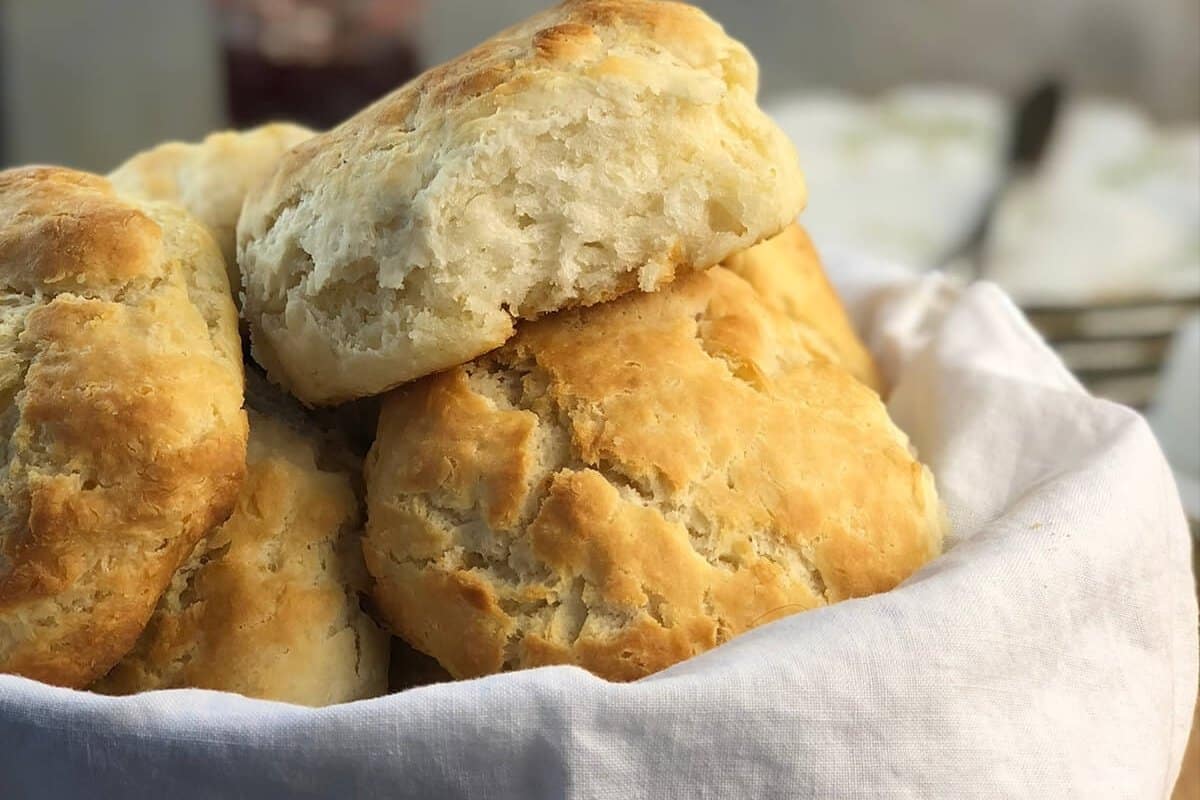
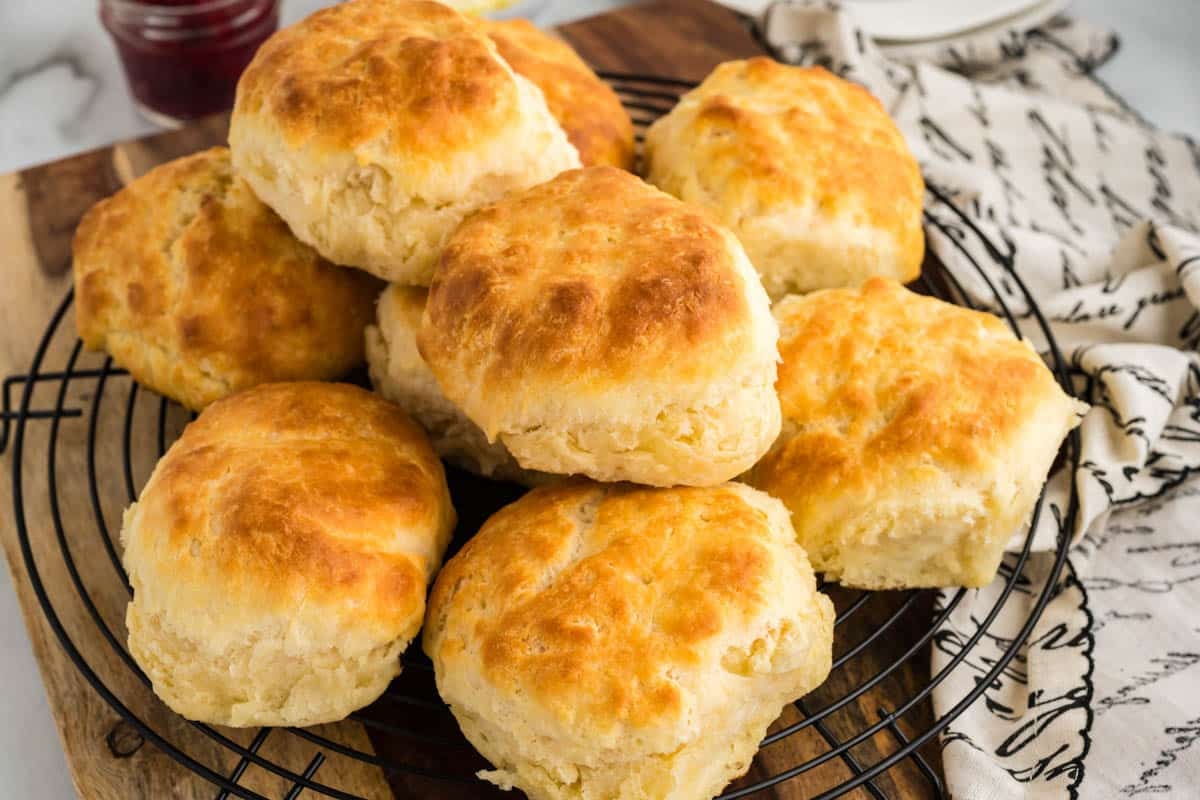
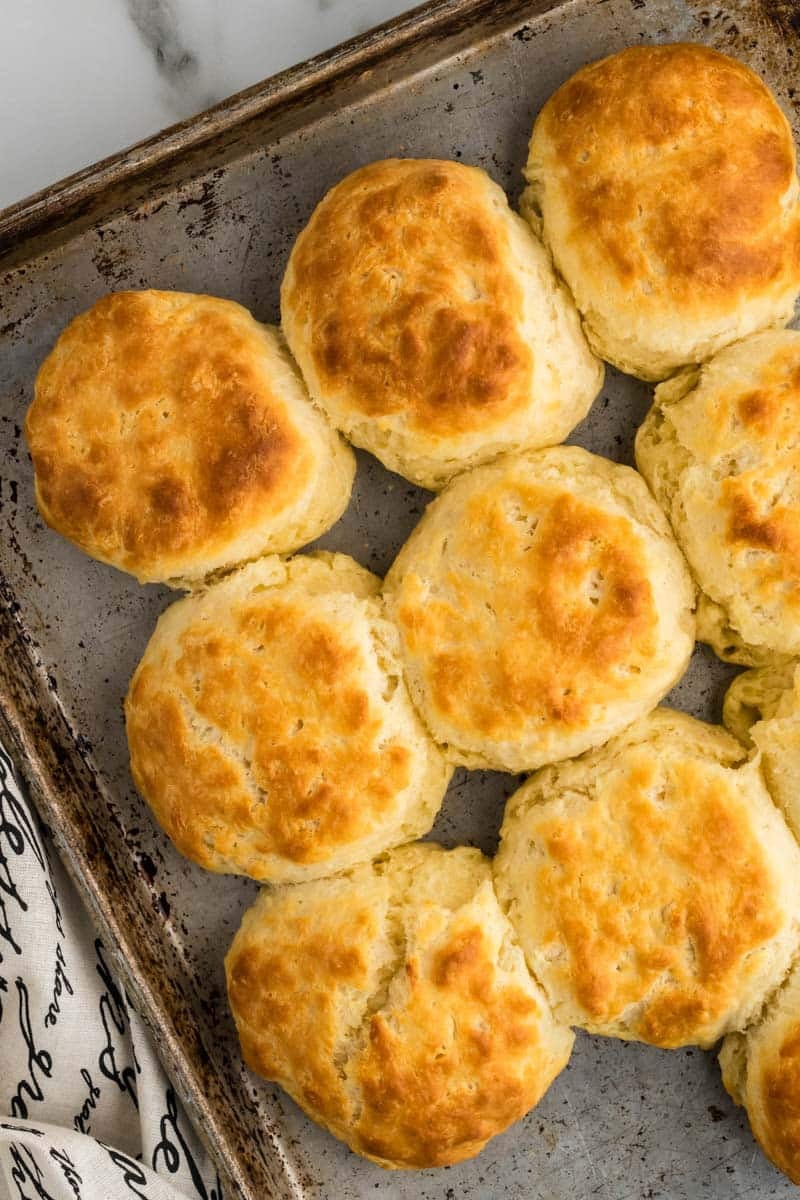
These old-fashioned buttermilk biscuits are the recipe my family has been making for four generations. Soft, flaky, and tall, with crisp golden tops and that tangy buttermilk pull. Made with White Lily flour, cold butter, and full-fat buttermilk, they come together in one bowl with no rolling and no biscuit cutter.
If you’ve ever ended up with hard, flat biscuits, this method will fix that. Thousands of readers have made these Southern buttermilk biscuits with success, and I promise you can, too.
Thanks for the recipe with step-by-step directions…that’s what I need, biscuit making for dummies! 🤣 I made my first batch this morning, Christmas Day. They turned out great!
RHONDA

As a fourth-generation Southern cook, I’ve been making biscuits since I was knee-high to a grasshopper. Along the way, I’ve learned what not to do and how to make the best biscuits you’ve ever tasted!
What are cathead biscuits?
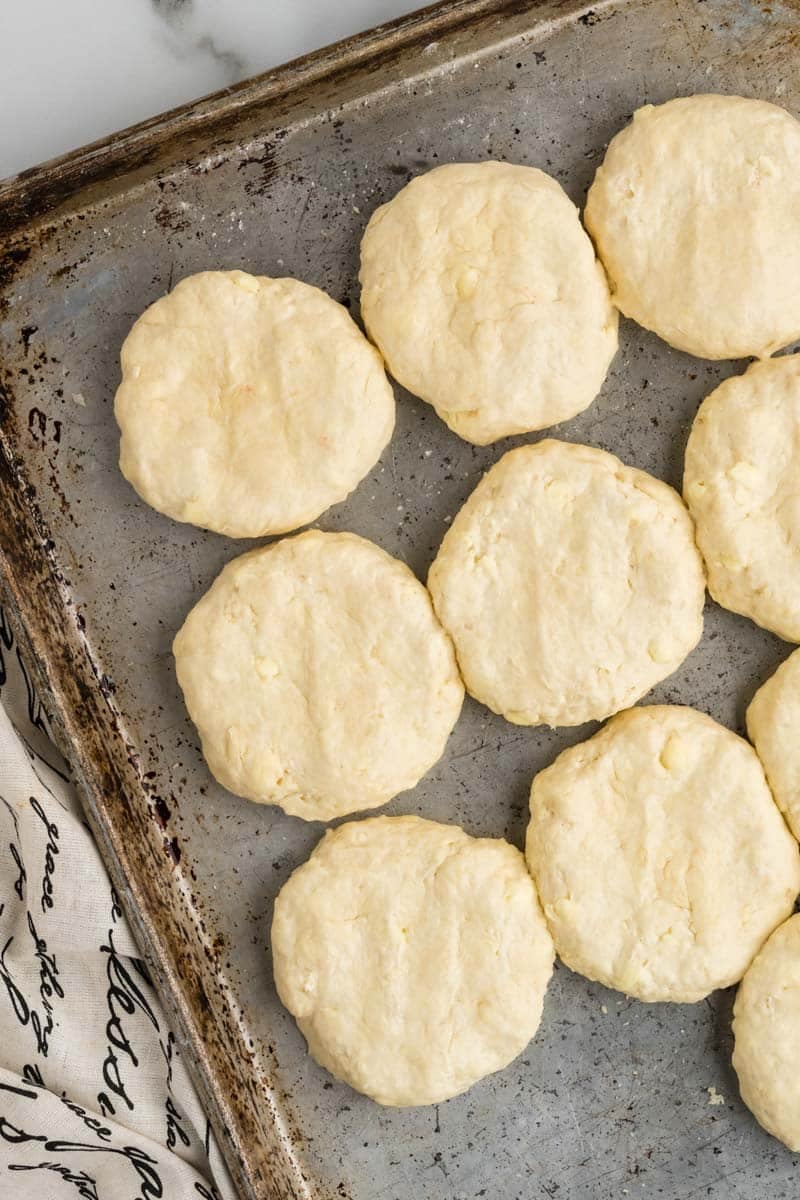
Cathead biscuits are big, hand-rolled Southern buttermilk biscuits, called that because they’re about the size of a cat’s head. Instead of rolling and cutting the dough, you scoop up a handful, roll it lightly in your palm, and place it on the pan.
This is how my family has always made them, and it’s a little different from most recipes you’ll find. The method produces soft, tender biscuits every time because you’re barely touching the dough. You almost cannot overwork it.
After making these a few times, you’ll learn the feel of the dough and know when to add a little more flour or buttermilk.
What I learned testing this buttermilk biscuit recipe
- I’ve tested this recipe with less butter, just shortening, and a mix of shortening and butter. My preference is just butter and never less — always more.
- I’ve tested rolling and cutting the biscuits, and don’t see a reason to do that extra work. The method I use worked for my Granny for 90 years, so it works for me.

I hope you make this recipe. I think you’ll love it!

What makes Southern buttermilk biscuits different
A Southern buttermilk biscuit isn’t just a biscuit made below the Mason-Dixon line. There’s actual chemistry behind why ours are softer and lighter than the biscuits made anywhere else.
It comes down to the flour. Southern flour, like White Lily, is milled from soft winter wheat, which has less protein than the hard wheat used in most national flour brands. Less protein means less gluten, and less gluten means a tender, fluffy crumb instead of a chewy, bready one. If you’ve ever made biscuits with King Arthur or Gold Medal and wondered why they came out denser or felt like a hockey puck, that’s why. Well, the hockey puck biscuit would be because you overworked the dough, but we’ll get to that later.
The buttermilk does two jobs. It adds the tang Southerners grew up tasting, and the acid reacts with the leavening to give you serious lift. Use full-fat buttermilk for the best flavor and texture. Low-fat buttermilk or sweet milk will give you a biscuit, but it probably won’t be fit to eat.
And then there’s the method. Southern cooks have been making cathead biscuits, the hand-rolled kind, long before pastry cutters and biscuit rounds showed up in kitchen drawers. You scoop the dough, roll it lightly, and set it on the pan. Less handling, more rise.
What to serve with buttermilk biscuits
Is there anything that doesn’t go with biscuits? I don’t think so! First, you’ve got to set out some butter to soften. You can never go wrong with jam or my reader-favorite homemade Strawberry Freezer Jam.
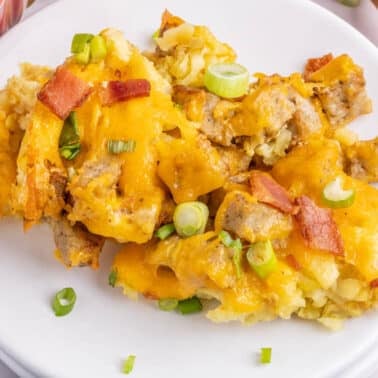
Serve your homemade buttermilk biscuits with classic Southern meals like fried chicken and mashed potatoes, pork chops and rice, or just as part of your brunch spread with cheese grits casserole and a sausage breakfast casserole.
Related 📖 ➡️ How to Host a Southern Brunch
Ingredient notes
➡️➡️➡️ The full ingredient amounts and instructions are listed below on the printable recipe card. Scroll below the recipe card for frequently asked questions and tips for success.
White Lily flour: The best Southern biscuits are ALWAYS made with White Lily flour. If I don’t have White Lily, then I’m not making biscuits.
You can make the biscuits using self-rising flour or all-purpose flour. My preference is for all-purpose flour. There are slight differences in both taste and rise. But the difference isn’t significant enough that I won’t ever use self-rising flour, which is so convenient when you’re in a hurry.
Unsalted butter: The butter needs to be cold. You can dice it, then stick it in the freezer for 10-15 minutes to chill it really well.
Buttermilk: Use full-fat buttermilk, not fat-free or low-fat.

Tips:
- I don’t grease my pan, but you can if you want. I would just do it very lightly. These biscuits have so much butter that they should release easily. You can also use a silicone baking mat if you prefer. You can also use parchment paper, although use caution with the oven being so hot!
- You want the flour and butter to become crumbly and well-mixed, but still have chunky butter pieces that you can feel.
- If the biscuit dough appears too dry and crumbly, you may need to add a little more buttermilk.
- Do not overwork the dough! The more you work the dough, the more likely your biscuits will turn out like hockey pucks. When the dough is ready, it will be smooth, slightly moist, and not as sticky.
- If you want soft sides, place the biscuits right next to each other. This technique can also help your biscuits rise a little higher. If you want crispier sides, give the biscuits some space in between.
- If you don’t bake immediately, refrigerate your biscuits so the butter stays nice and cold. Don’t refrigerate for more than an hour, as the buttermilk biscuits are best right after they’re put together. I usually get everything else done and bake the biscuits last, so they are hot as soon as we sit down at the table.
How to make buttermilk biscuits
- Start by preheating your oven to 500°. I know that sounds high, but that’s what produces the steam and causes the biscuits to rise. You cannot slow-cook homemade buttermilk biscuits!
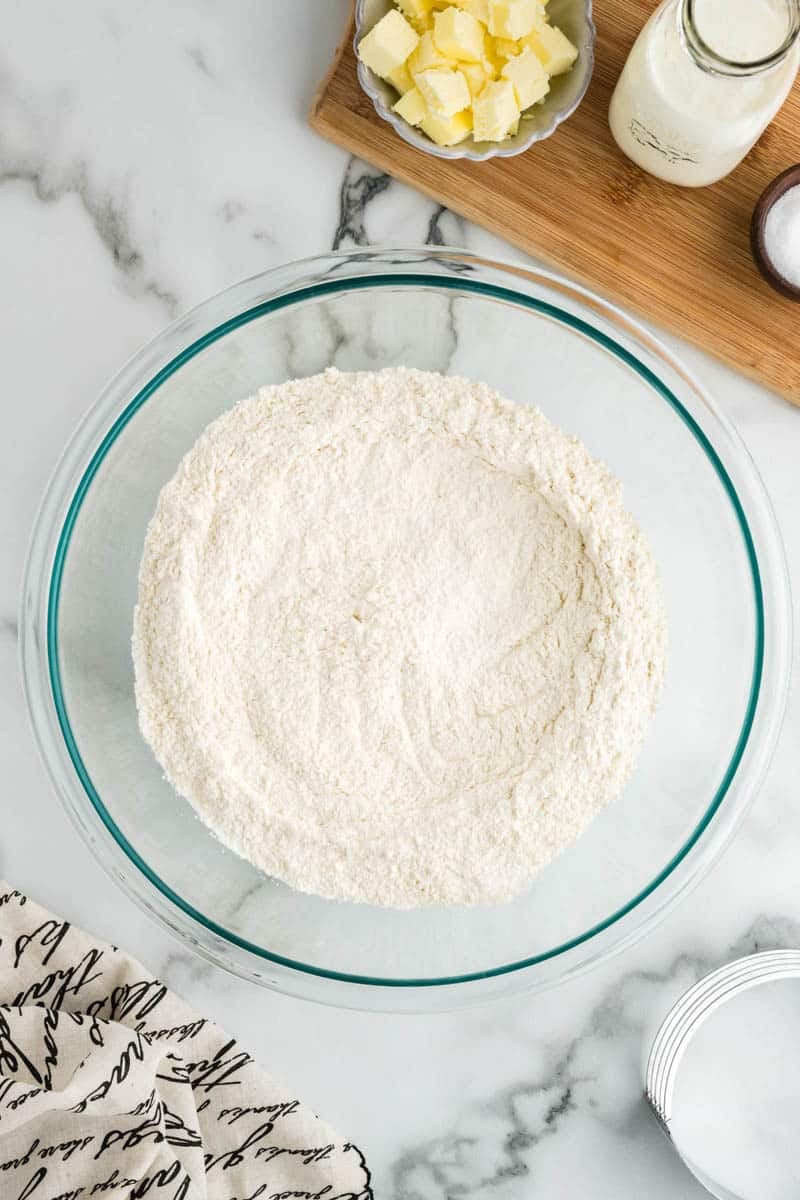
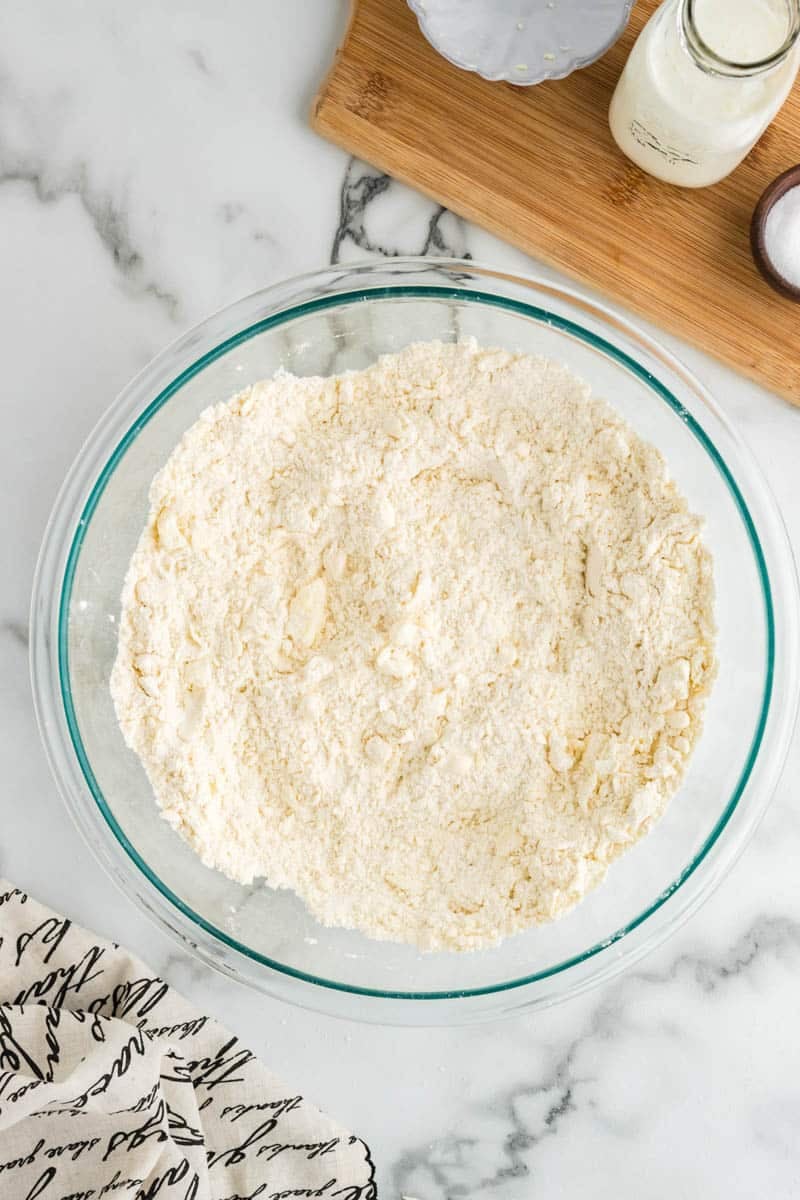
- Add flour to a large bowl. If you’re using all-purpose flour, stir in the baking powder and salt.
- Mix the cold butter into the flour with your hands or a pastry blender. You want to see pebbly chunks, and it should feel almost like wet beach sand.
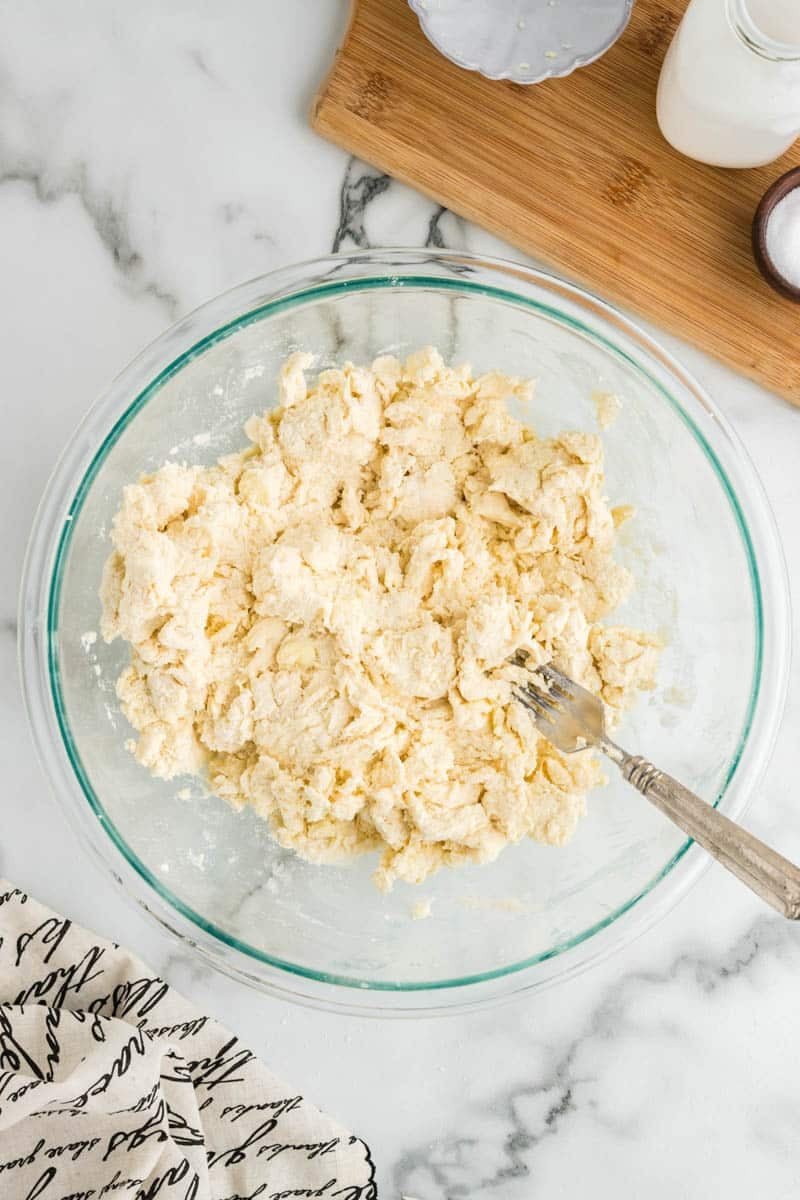
- Pour in the cold buttermilk and stir with a fork, making sure all the dry flour is mixed in.
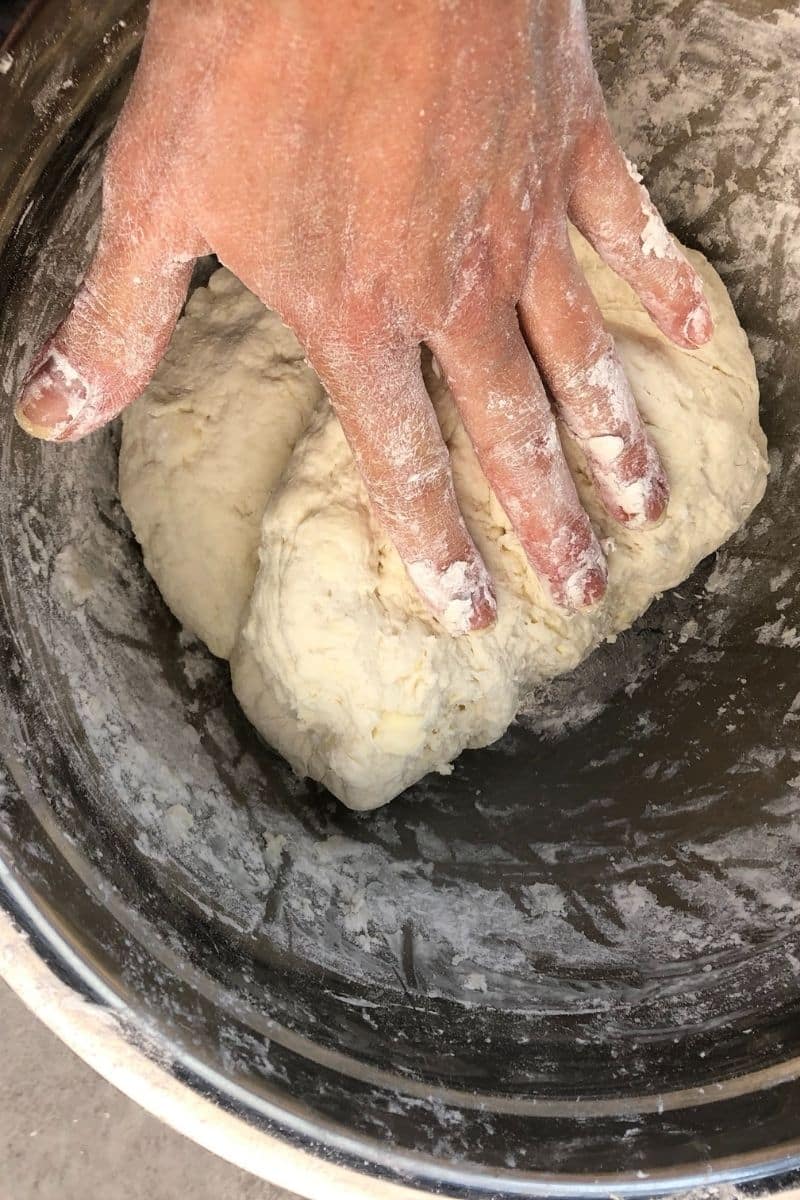
- Dip your hands in flour and then gently knead the dough. Then scoop out large portions and place on a baking sheet.
- Bake the biscuits for about 8 minutes or until golden brown on the top.

If you make this recipe, please leave a comment and ⭐️⭐️⭐️⭐️⭐️ below!
Join Southern Food and Fun Community group
and Southern Potluck group!
And please follow us on social media:
Southern Buttermilk Biscuits Recipe
Equipment

Ingredients
If using self-rising flour:
- 4 cups White Lily self-rising flour
- 2 sticks cold unsalted butter, diced into small chunks
- 1 ½ – 1 ¾ cups full-fat buttermilk
If using all-purpose flour:
- 4 cups White Lily all-purpose flour
- 2 tablespoons baking powder
- 2 teaspoons salt
- 2 sticks cold unsalted butter, diced into small chunks
- 1 ½ – 1 ¾ cups full-fat buttermilk
Instructions
- Preheat oven to 500 degrees F. Place 4 cups White Lily self-rising flour in a large bowl. If using all-purpose flour, whisk in the baking powder and salt.

- Mix in 2 sticks cold unsalted butter, diced into small chunks using your hands or a pastry blender. Smooth some butter into flat flakes and leave some as chunky pebbles.
- Make a well in the center of the flour and add 1 ½ – 1 ¾ cups full-fat buttermilk, using a fork to incorporate the flour from the sides of the well.
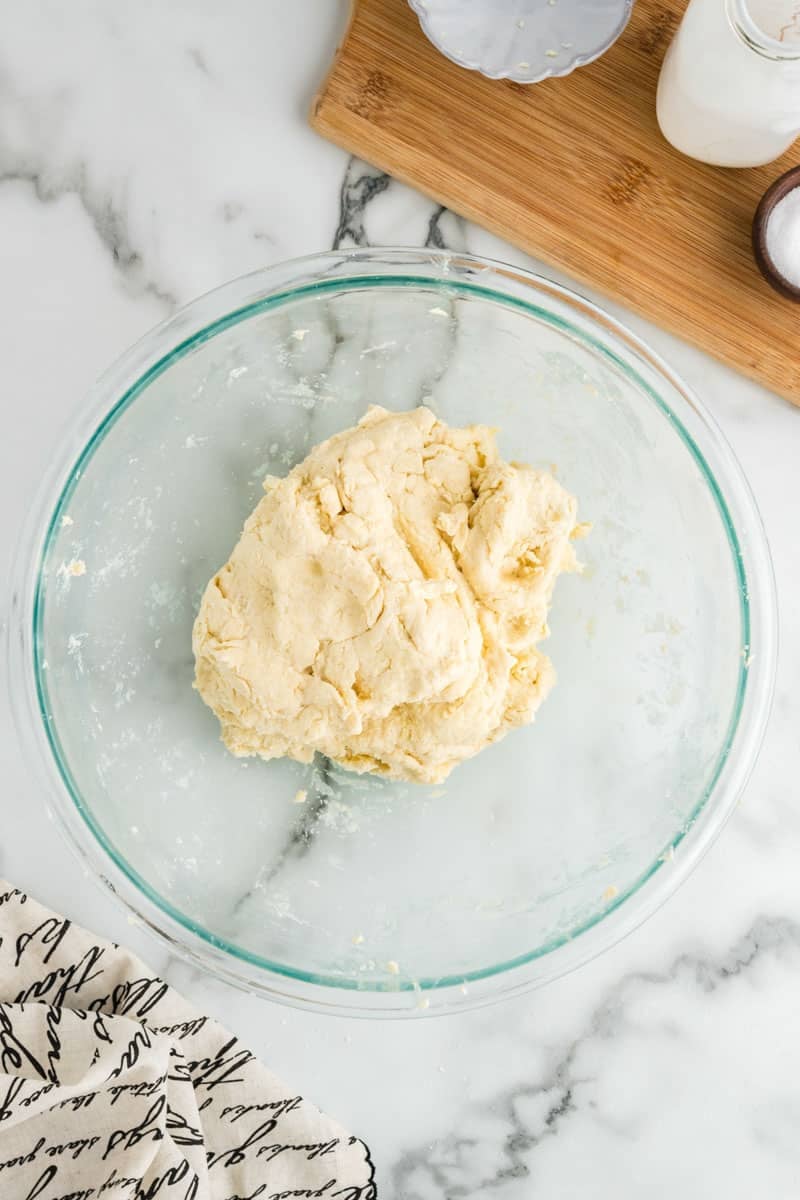
- Stir until the flour is all incorporated and you have sticky dough. Then dip your hands in flour and sprinkle a little more flour on the dough until you can handle the dough without it sticking to your fingers. If the dough appears too dry and crumbly then you probably need to pour in a little more buttermilk.
- Knead very gently by folding the dough into itself a few times.
- Once the dough is smooth and easy to handle, pick up a large handful of dough and roll slightly and place on pan, then flatten a bit until it’s about an inch high.
- Bake 10-12 minutes until golden brown. Allow the biscuits to cool on the pan for just a couple of minutes, then remove with a spatula and cover lightly with a towel to keep warm.
Notes
- Most important: do not overwork the dough. You want to barely activate the gluten. This is not bread-making and you do not need to knead the dough for very long.
- Make sure your butter and buttermilk are COLD. Now, some folks will tell you that even using your hands to mix up the flour and butter will soften the butter too much, but I’ve made hundreds of biscuits over the years, and that method works just fine for me. If it makes you feel better, though, use a fork or a pastry cutter.
- The oven should be HOT when you put the buttermilk biscuits in there.
Nutrition
Buttermilk biscuit FAQs
Storage
I store my biscuits in an old biscuit tin that belonged to my great-grandmother. If you don’t have one of those, you can store your biscuits in a bread basket covered with a towel or in a plastic storage bag. I like the basket and towel better because they don’t get moist like in a bag.
You can reheat biscuits in the microwave for about 15 seconds, or wrap them lightly in foil and reheat them in an oven set to about 350 degrees F.
You sure can! There are two ways to freeze these buttermilk biscuits:
1. Make the dough, then set the unbaked biscuits on a parchment-lined pan. Place the pan in the freezer overnight, and then remove the biscuits the next morning and put them in a gallon-size airtight bag. When you want to cook a biscuit, bake it from frozen at 475°. This is the only case in which you’ll have the oven slightly below 500 degrees F, since the frozen biscuit needs to cook a little longer.
2. Bake the biscuits as directed in the buttermilk biscuit recipe. Allow to cool completely, and then place on a parchment-lined pan. Freeze overnight and then place in an airtight bag. When serving, allow to thaw completely, then microwave for about 12 seconds or reheat for just a few minutes in the oven.
White Lily all-purpose or self-rising flour, every time. It’s milled from soft winter wheat, which has lower protein than national brands. You can use Gold Medal or King Arthur in a pinch, but the biscuits will be slightly denser. If you’re using all-purpose flour of any brand, add 2 tablespoons of baking powder and 2 teaspoons of salt to 4 cups of flour.
Three common reasons: the oven wasn’t hot enough (you need 500 degrees F), the butter or buttermilk weren’t cold enough when they went into the dough, or you overworked the dough. Heat creates steam, cold fat creates flaky layers, and gentle handling keeps the gluten from tightening up.
You can, but they won’t taste the same. For a quick substitute, add 1 ½ tablespoons of white vinegar or lemon juice to a measuring cup, then fill to 1 ½ cups with whole milk. Let it sit for 5 minutes before using.
Drop biscuits use a wetter dough that you literally drop onto the pan with a spoon. They’re craggy and irregular. Southern buttermilk biscuits, even cathead-style, use a stiffer dough that you shape lightly with your hands. They’re taller, tidier, and have more distinct flaky layers.
You can make biscuits in an air fryer. I haven’t done it myself and don’t think I would, but I’ve seen recipes for cooking biscuits in an air fryer, so evidently, people are having some success with this method.


So yummy, so easy
My family loved this!
This is similar to the recipe l’ve been using for over 20 yrs. Add 1/2 teaspoon of cream of tartar makes for a lighter biscuit. I also add 1 teaspoon of sugar.
Thanks for the recipe with step-by-step directions…that’s what I need, biscuit making for dummies! 🤣 I made my first batch this morning, Christmas Day. They turned out great!
So happy you made the biscuits! xoxoxo
Lucy – What an easy recipe compared to others! I followed exactly, including Lily’s SR Flour. mine took about 15 minutes at 500 – but wow how light and full of flavor! Two extra steps….after I cubed the butter into caper size cubes, I put the whole bowl of butter in the freezer for an hour. Second, after I mixed everything together I set the whole bowl of dough in the freezer for 30 minutes, took it out made 12 balls, pressed with a fork and into the 500 degree oven in about 4 minutes. But no cutting with biscuit cutter,rolling up scraps,so easy!
Yay! Sounds perfect!
I felt as reading this, as if I were writing it. We are from the south, and not only is this exactly how Mama taught me to make my biscuits, but,my husband grew up calling them cat head biscuits. He told me that they always said they were the size of a cats head. This bring back memories for us. It was nice to see someone makes them exactly like I do. This is a true southern buttermilk biscuit. Thank you for sharing.
Thank you!
Yum! So glad you found me on twitter so i could find your site! We are so closeby
My husband makes buttermilk biscuits nearly every weekend! Nothing beats them. Yours look great.
Thanks, Molly. Lucky you! My husband probably wouldn’t even know how to open a can of biscuits, much less make from scratch. But he does clean, so it all works out.
Thanks, Sheila. That picture is of my great-grandparents, not sure of the date.
Good luck with the biscuits — and don’t give up if they don’t turn out great the first time. It really does take practice.
When I opened your blog and saw your pictures of the sweet couple, it brought tears to my eyes. They so remind me of my grandparents and the depression era that brought us such great foods. I try so hard to make biscuits, but they are always tough. Your step by step photos may be just what I need to be successful! They look delicious and my husband will be so happy tomorrow if I make mine look like yours. I’m a Southern cook who is deficent in baking breads and biscuits…not a good thing. Thanks for the great blog post
Sheila