This post may contain affiliate links. Please read our disclosure policy.

Ready to learn how to make roasted garlic? You’ll be amazed at how easy it is! Our method is simple and doesn’t require any special tools or ingredients. You can meal-prep your roasted garlic at the beginning of the week and add this umami flavor to recipes all week.
This is not a typical Southern recipe. I’m pretty sure I never had roasted garlic as a child, although I do remember my grandfather growing garlic in his garden.
As an adult, however, I fell in love with this savory vegetable. I use it in so many recipes, like Chicken with 40 Cloves of Garlic, Garlic Roasted Green Beans and Tomatoes, Fresh Tomato Sauce with Garlic and Basil, and Soy Garlic Chicken.
One of my favorite things to do with this oven-roasted garlic is to add it to my Southern mashed potatoes. The potatoes are already delicious with Braised Beef Short Ribs, but once you stir in the mashed garlic, you take that dish to a whole new level.
Why you’ll love this recipe
EASINESS – The best part is that this recipe is so easy — for just about five minutes of prep time, you’ll end up with enough garlic to use multiple times, and you can freeze the leftovers.
VERSATILITY—If you want a restaurant-style presentation, you can serve the roasted garlic in a small dish with the whole cloves and let people squeeze out a clove as needed. You can also mash the garlic with butter to create a spread for bread or slather on meat. There are so many possibilities!
I hope you’ll add this roasted garlic recipe to your meal rotation. I think you’ll love it, and your folks will request it over and over!
What you’ll need to make roasted garlic
➡️➡️➡️ The full ingredient amounts and instructions are listed below on the printable recipe card. Scroll below the recipe card for frequently asked questions and tips for success.
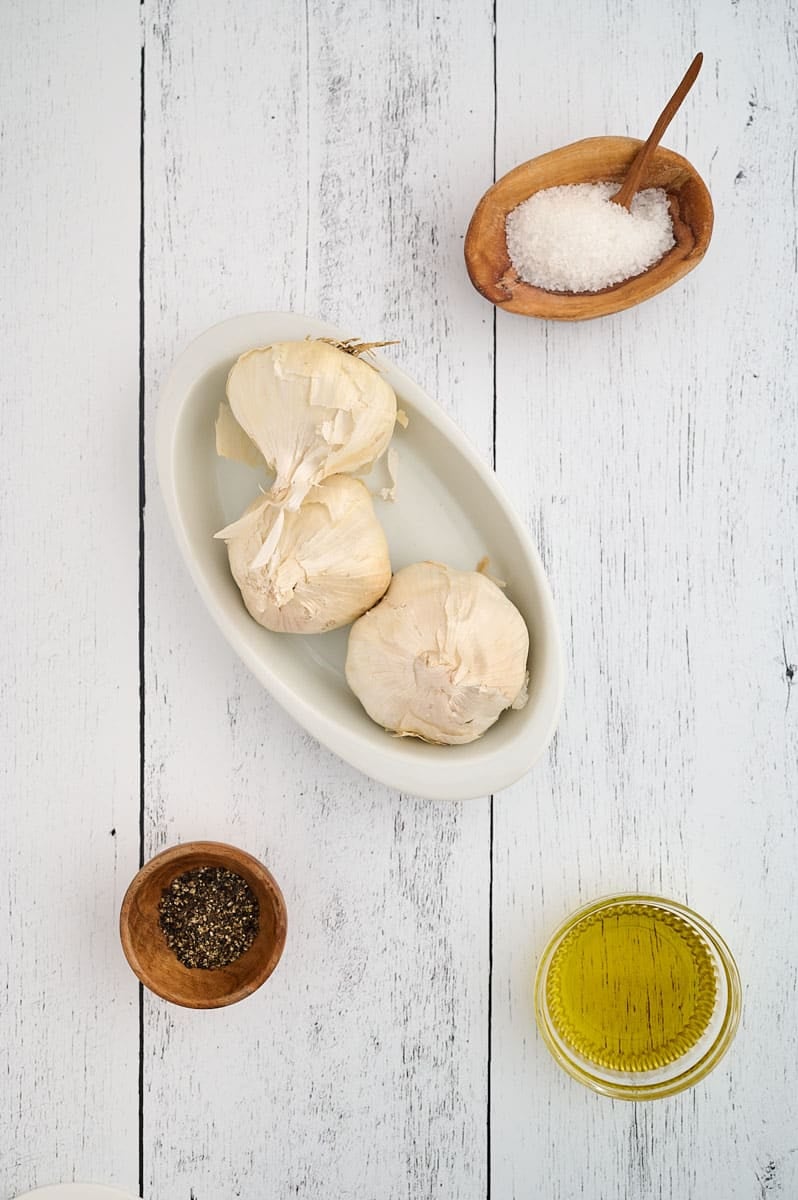
Fresh garlic – you can use regular or elephant garlic. Just know that elephant garlic may take longer to cook.
Olive oil – use good quality olive oil because you’re going to drizzle generously.
Salt and pepper
While you don’t have to use any special tools, you might want to try a ceramic garlic roaster or a cast iron garlic roaster. We typically use foil and a small cast iron skillet.
Read more:
Everything You Need to Know About Roasted Garlic
A guide to everything you need to know about roasted garlic, including benefits, cooking methods, and ways to use it.
How to Make Roasted Garlic

Ingredients
- 3 heads garlic
- 2 tablespoons Olive oil
- 1 teaspoon Kosher salt
- 1 teaspoon Freshly ground black pepper
Instructions
- Preheat oven to 400. Peel papery outer layer of skin from garlic. Cut off about 1/4 inch from the top of the garlic head.
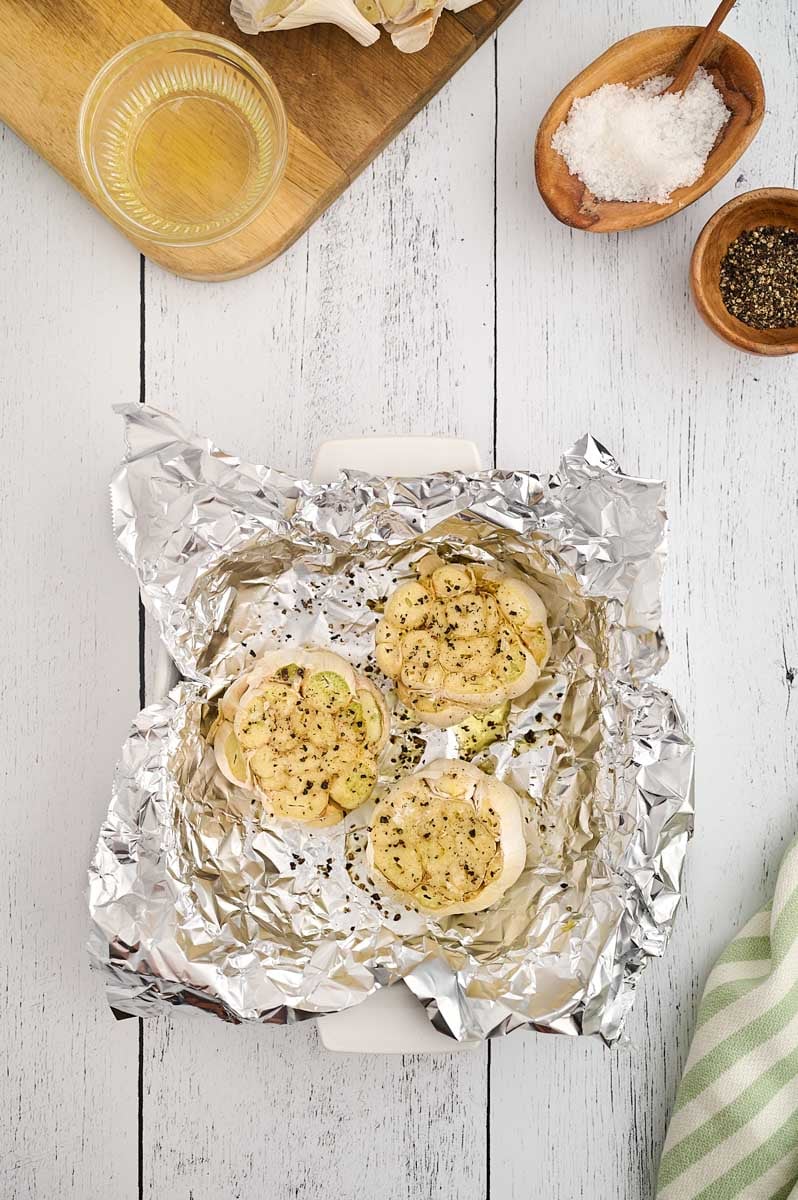
- Place garlic heads on piece of tin foil. Drizzle olive oil all over each garlic head. Sprinkle salt and pepper over each garlic head.
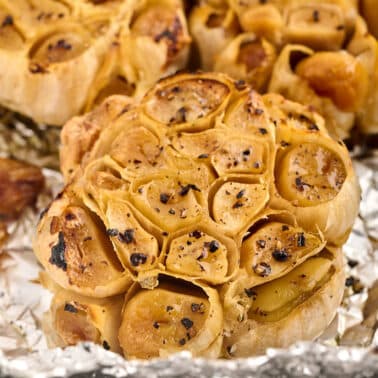
- Wrap with the foil and seal. Place foil in pan. Roast for 40-45 minutes, until golden brown.
- Squeeze bottom of garlic head until cloves pop out. Mash with fork and serve.
Notes
Nutrition
Update Notes: This post was originally published on June 11, 2014, and was updated on June 10, 2024, with one or more of the following: step-by-step photos, video, updated recipe, or new tips.
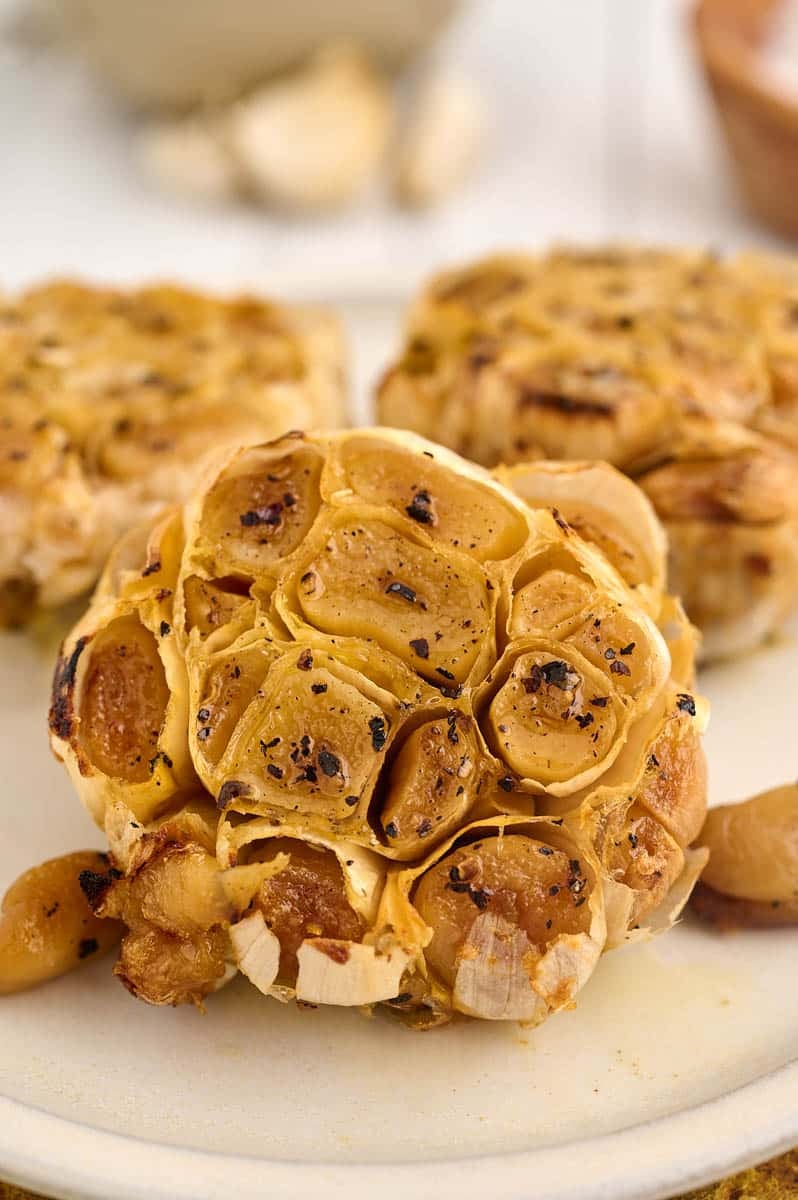
How to roast garlic in the oven
Step 1. Take two or three whole heads of garlic and slice off the tops. Peel off some of the outer layers of skin.
Step 2. Place the heads on a piece of tin foil and drizzle olive oil over each one, making sure you cover all the little cloves. Sprinkle salt and pepper over each garlic head.
Step 3. Wrap the tin foil tightly around the cloves and seal, then place it in a pan or baking dish just in case any olive oil drips through.
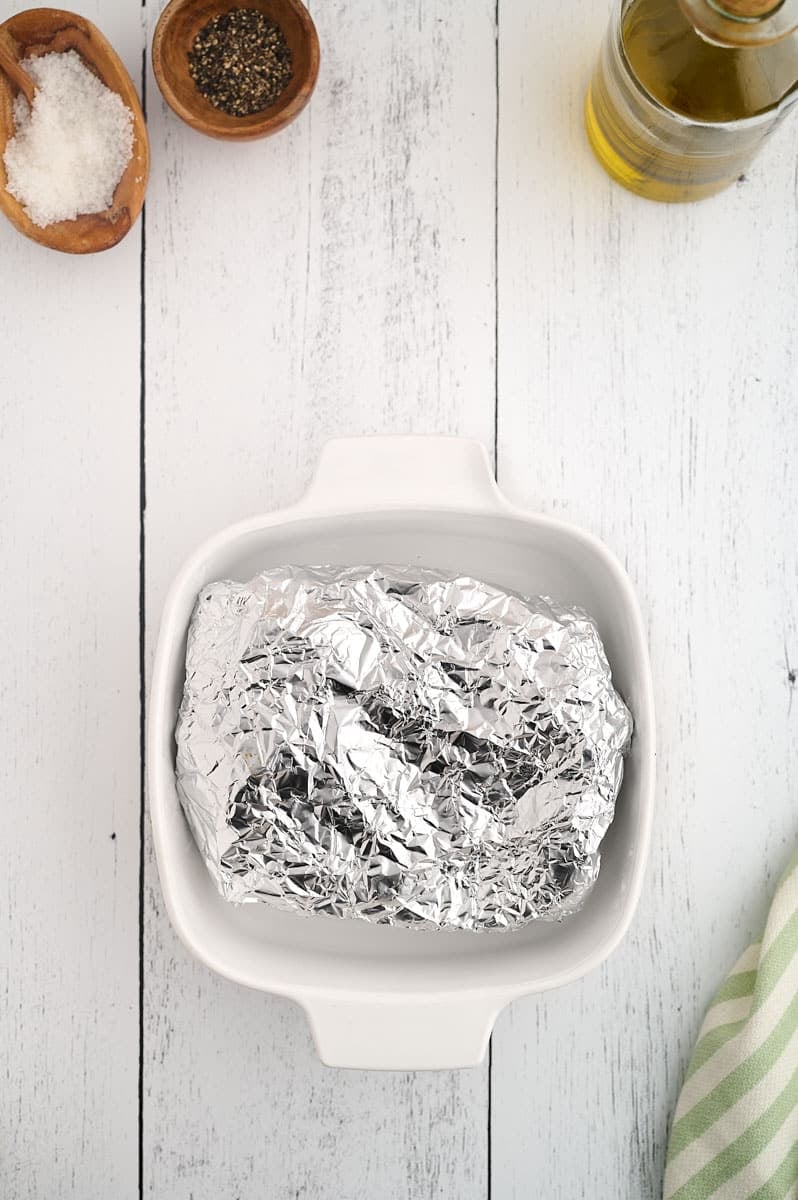
Step 4. Place the baking dish in a pre-heated 400° oven for about 45 minutes. If your garlic heads are jumbo or very large, you may need to roast for an hour. Just check and see if the cloves are brown and tender.

Recipe tip
Roast garlic in the oven when you’re cooking other things, like braised meats or casseroles. Place the garlic in its foil right next to whatever you’re cooking.
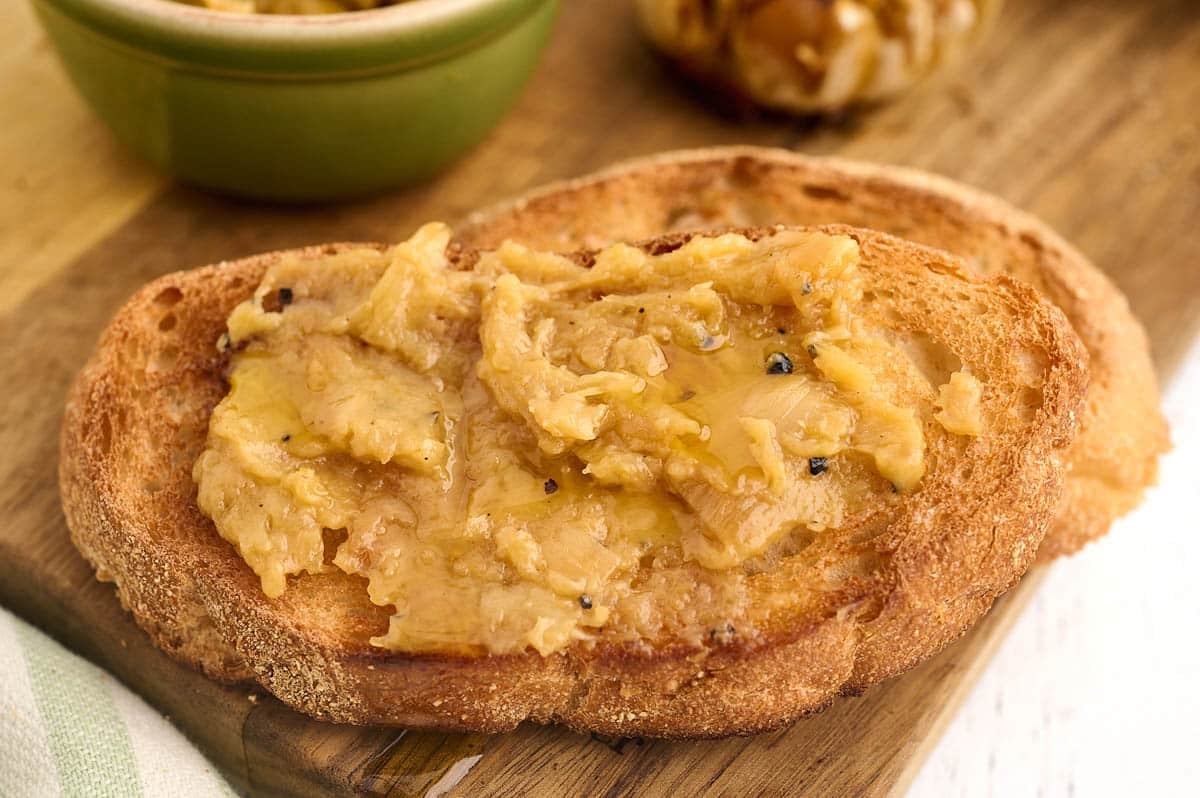
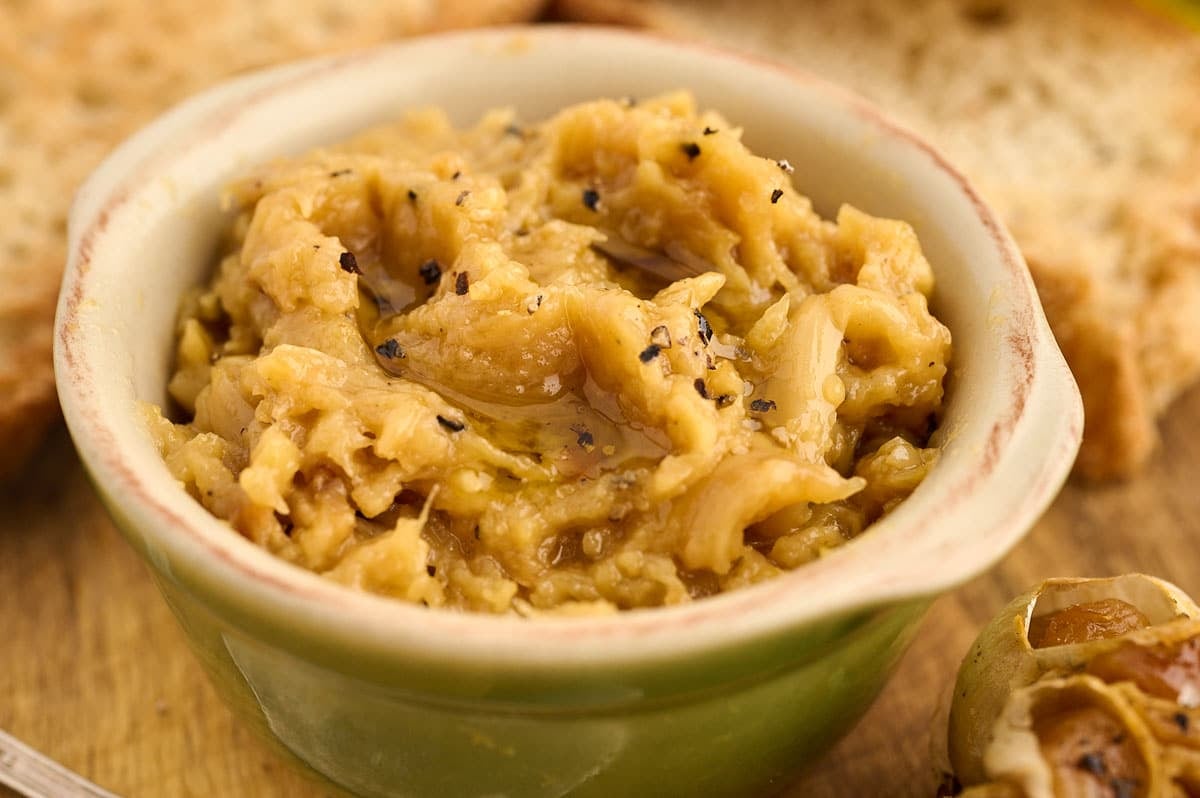
Roasted garlic spread
Squeeze the bottom of the head of garlic until the tender cloves pop out. Use a fork to mash the cloves, and add either softened butter or a little olive oil. Salt and pepper to taste. This garlic spread is great for toasting bread or roasting meat.
How to store roasted garlic
Store oven roasted garlic in the refrigerator. The roasted garlic keeps for several days and can be added to vegetables, soups, or meat.
Can you freeze roasted garlic?
You can absolutely freeze roasted garlic! Once the garlic has finished roasting, allow it to cool, then squeeze out the cloves and place them on a foil-lined baking sheet. Pop it in the freezer for a few hours. Once the cloves are frozen, transfer them to a freezer-safe container. The garlic will keep in the freezer for several months.
If you make this recipe, please leave a comment and ⭐️⭐️⭐️⭐️⭐️ below!
Join Southern Food and Fun Community group
and Southern Potluck group!
And please follow us on social media: